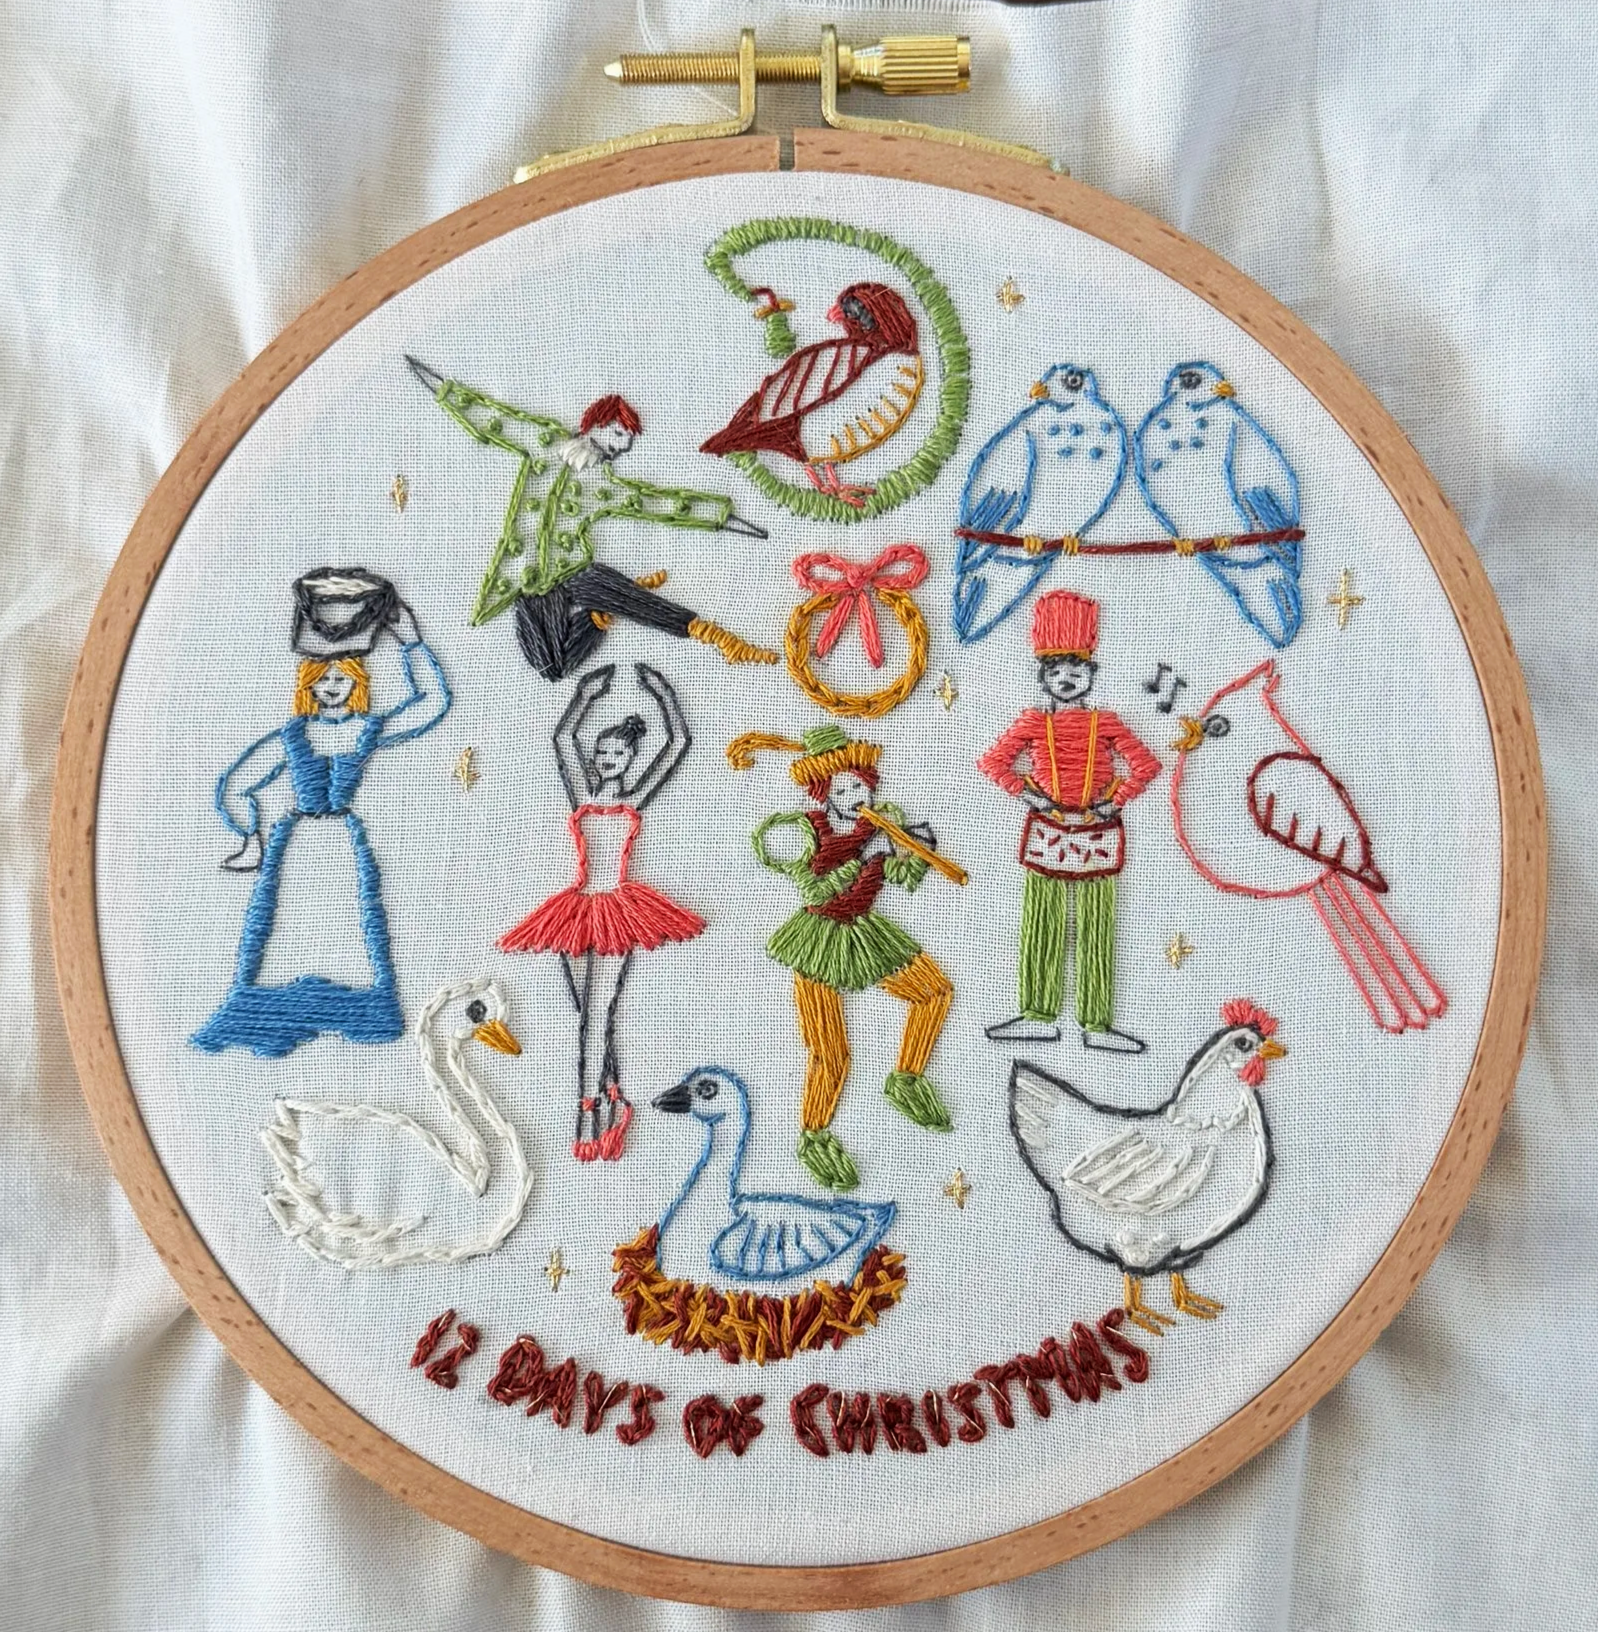
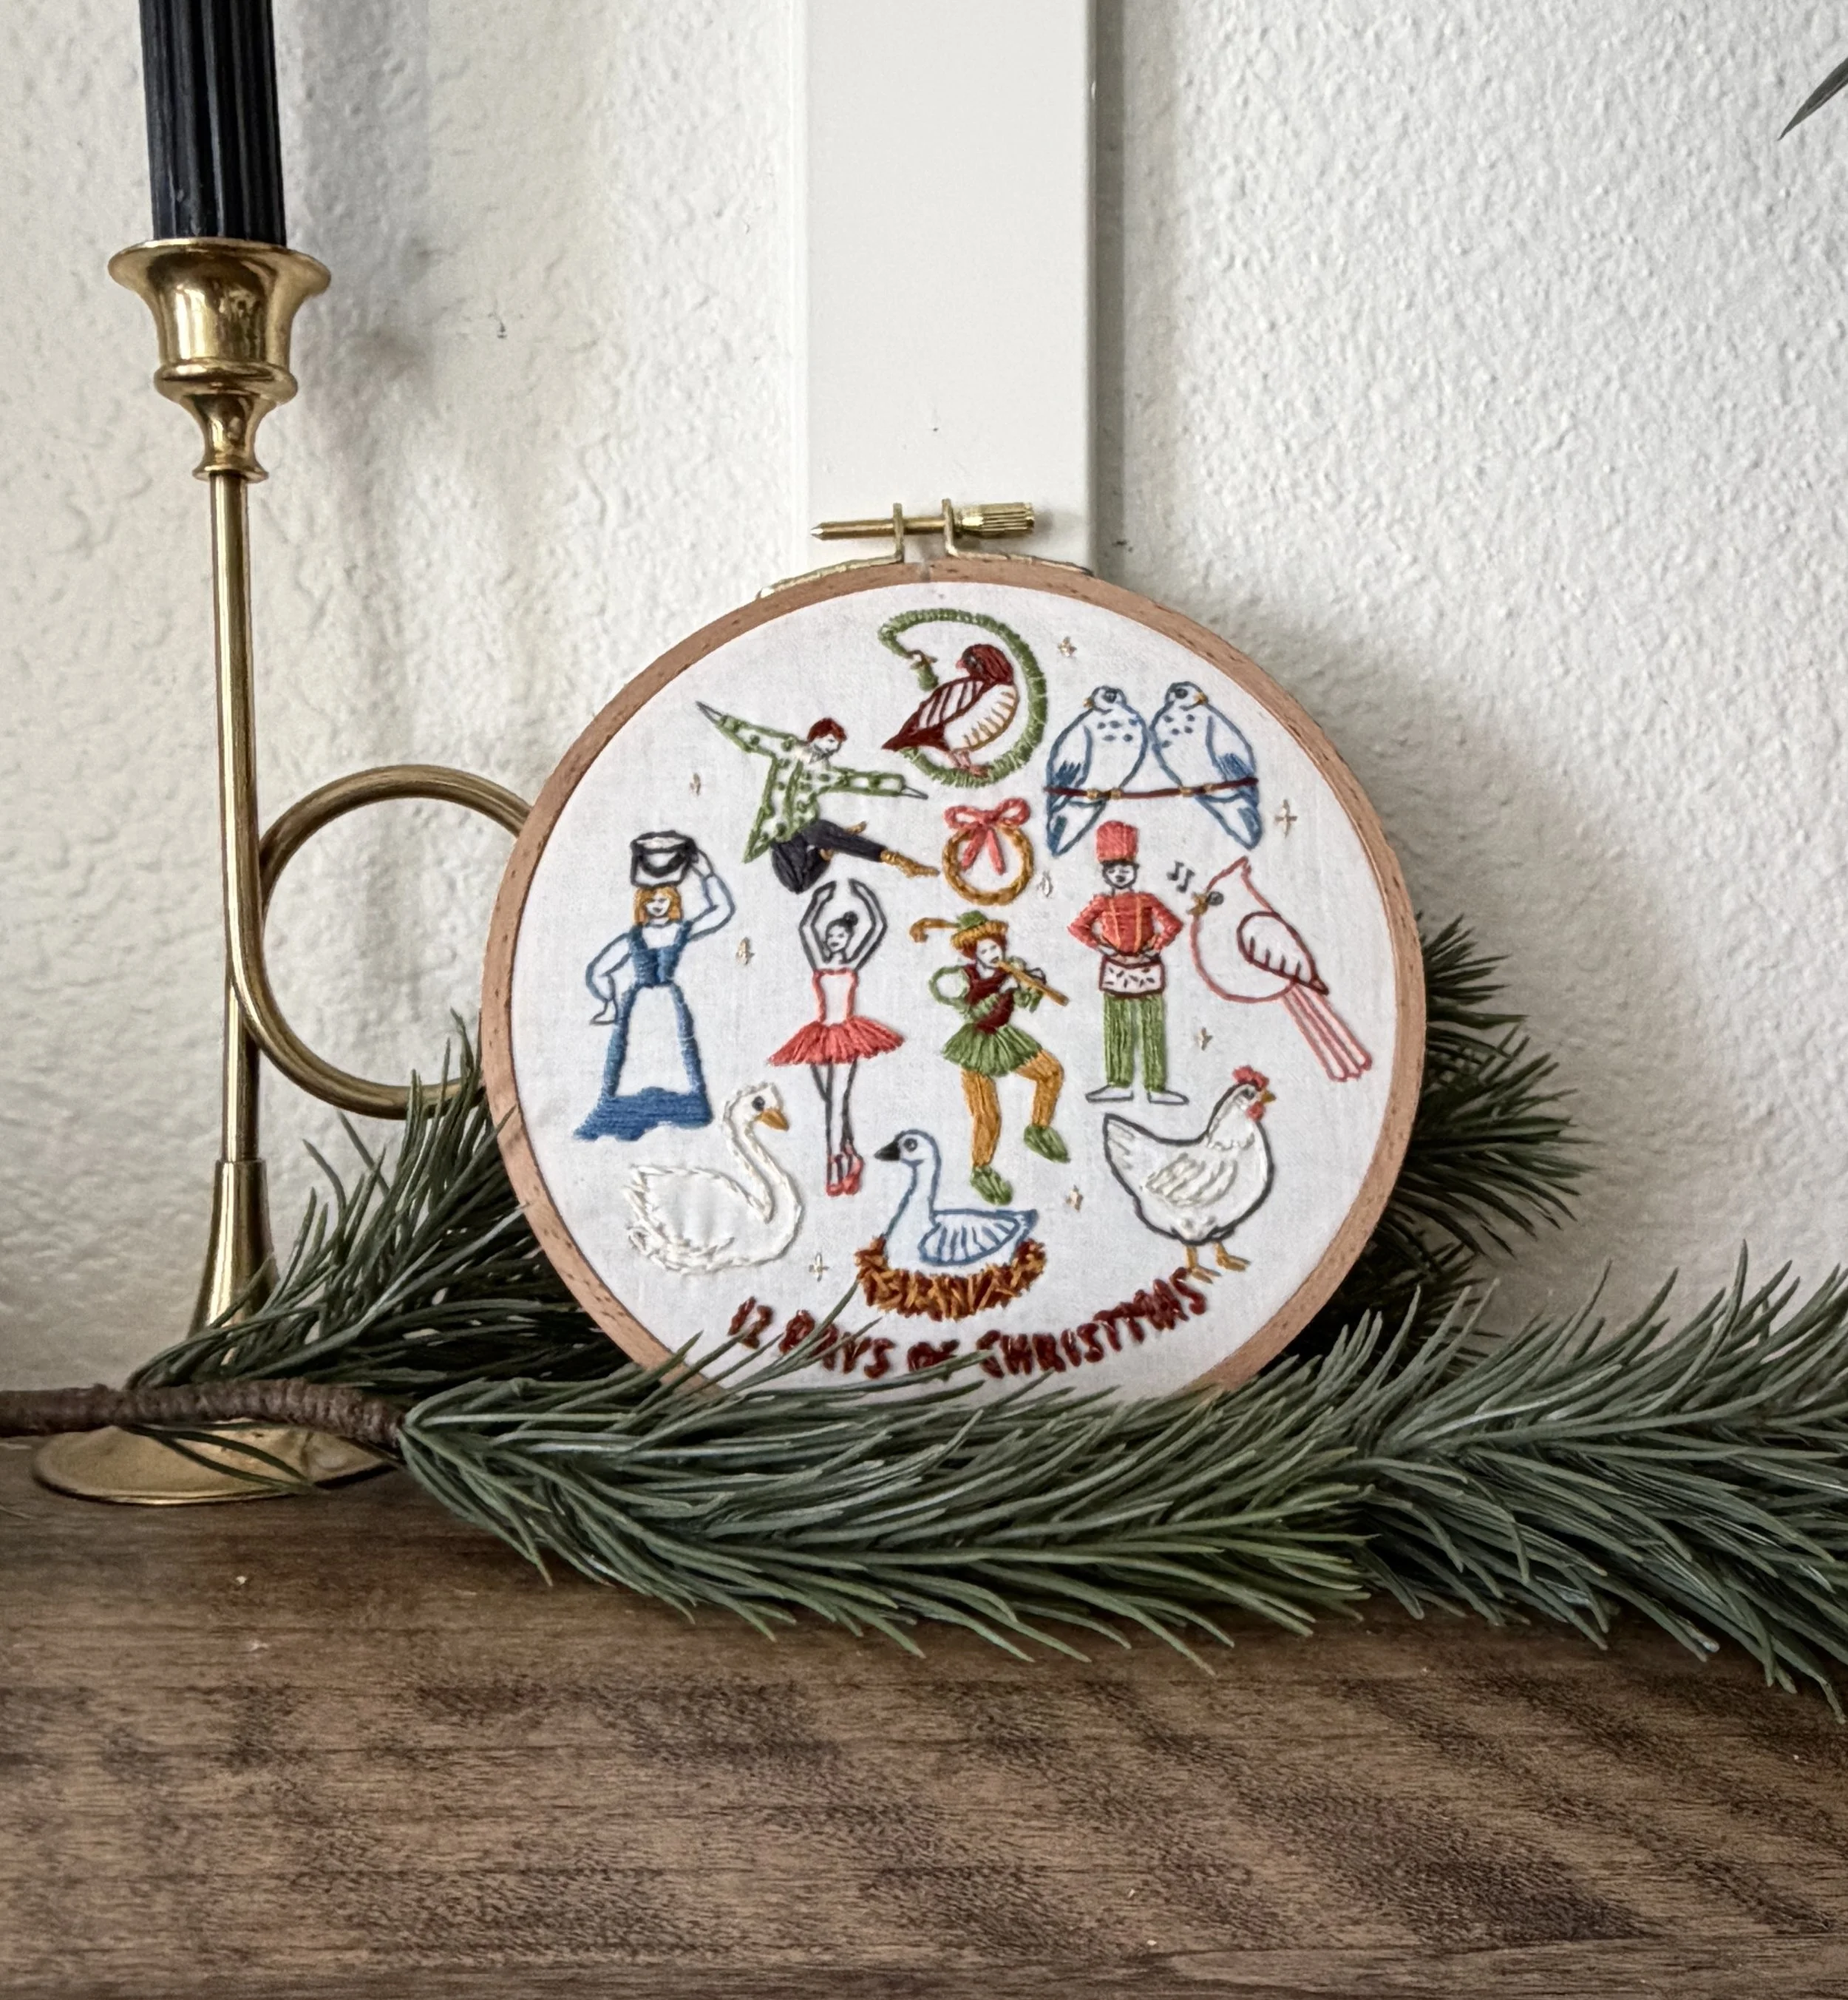
Twelve Days of Christmas
Embroidery Kit

Welcome!
-
△
Here, you’ll find everything you need to know to get started, to stitch the pattern, and to finish and display your completed piece.
-
△
-
△
Have questions? Explore the FAQs and don’t hesitate to reach out: needleandspruce@gmail.com.
12 Days of Christmas Kit Overview
Kit Contents Include:
Box to hold materials
Instructional brochure
Fabric with design printed on it
6-inch beechwood hoop
3 embroidery needles
7 DMC embroidery floss colors:
Medium Blue - DMC 322
Pewter Gray - DMC 413
Copper - DMC 920
Gold - DMC 783
Light Red - DMC 351
White - DMC 712
Green - DMC 470
Bonus gold sparkly thread ✨
Getting Started
Separate the two hoops. Center the fabric design on top of the smaller hoop, then secure it taught with the larger hoop on top. Tighten the fastener at the top, pulling the canvas tight at the same time to create a smooth, even surface to work with.
Each piece of floss is composed of 6 individual strands. You can separate these out to create thinner and thicker lines when embroidering.
Cut about an arm’s length of embroidery floss at a time and separate out your desired number of strands. Tie both ends in a double knot to keep the thread in place in the back as you begin.
As you stitch, be sure to keep tension in the thread — but don’t stitch so tight that it puckers.
And if you make a mistake or don’t like the look of something, cut it out and start that section again!
Types of Stitches in This Pattern
-

Split Stitch
Good for outlines and text. You could also use split back stitch or back stitch to achieve these outlines.
Begin with a straight line. Pierce this stitch from the bottom (1) and go back down a stitch away (2). Repeat (3).
-

Satin Stitch
Good for filling in larger spaces.
Begin with a straight line (1,2). Come back up from the same side as 1 to maintain stitch direction (3). Repeat to fill shape.
-

French Knot
Makes small knot-shaped circles. A colonial knot stitch would also work here.
Wrap thread around the needle and place the needle tip back near the exit point (2). Pull the thread taught while pulling the needle smoothly through to create a knot.
-

Chain Stitch
Good for lettering and filling in space with texture. Looks like lines of loops connected to each other.
Bring needle up and down in the same hole (1), but don’t pull it all the way through — leave a loop. Then bring the needle up through the middle of the loop (2) and pull slowly to tighten the thread. Bring needle back down through 2 and repeat.
-

Seed Stich
Results in scattered stitches in random directions. Can be all separate or overlapped.
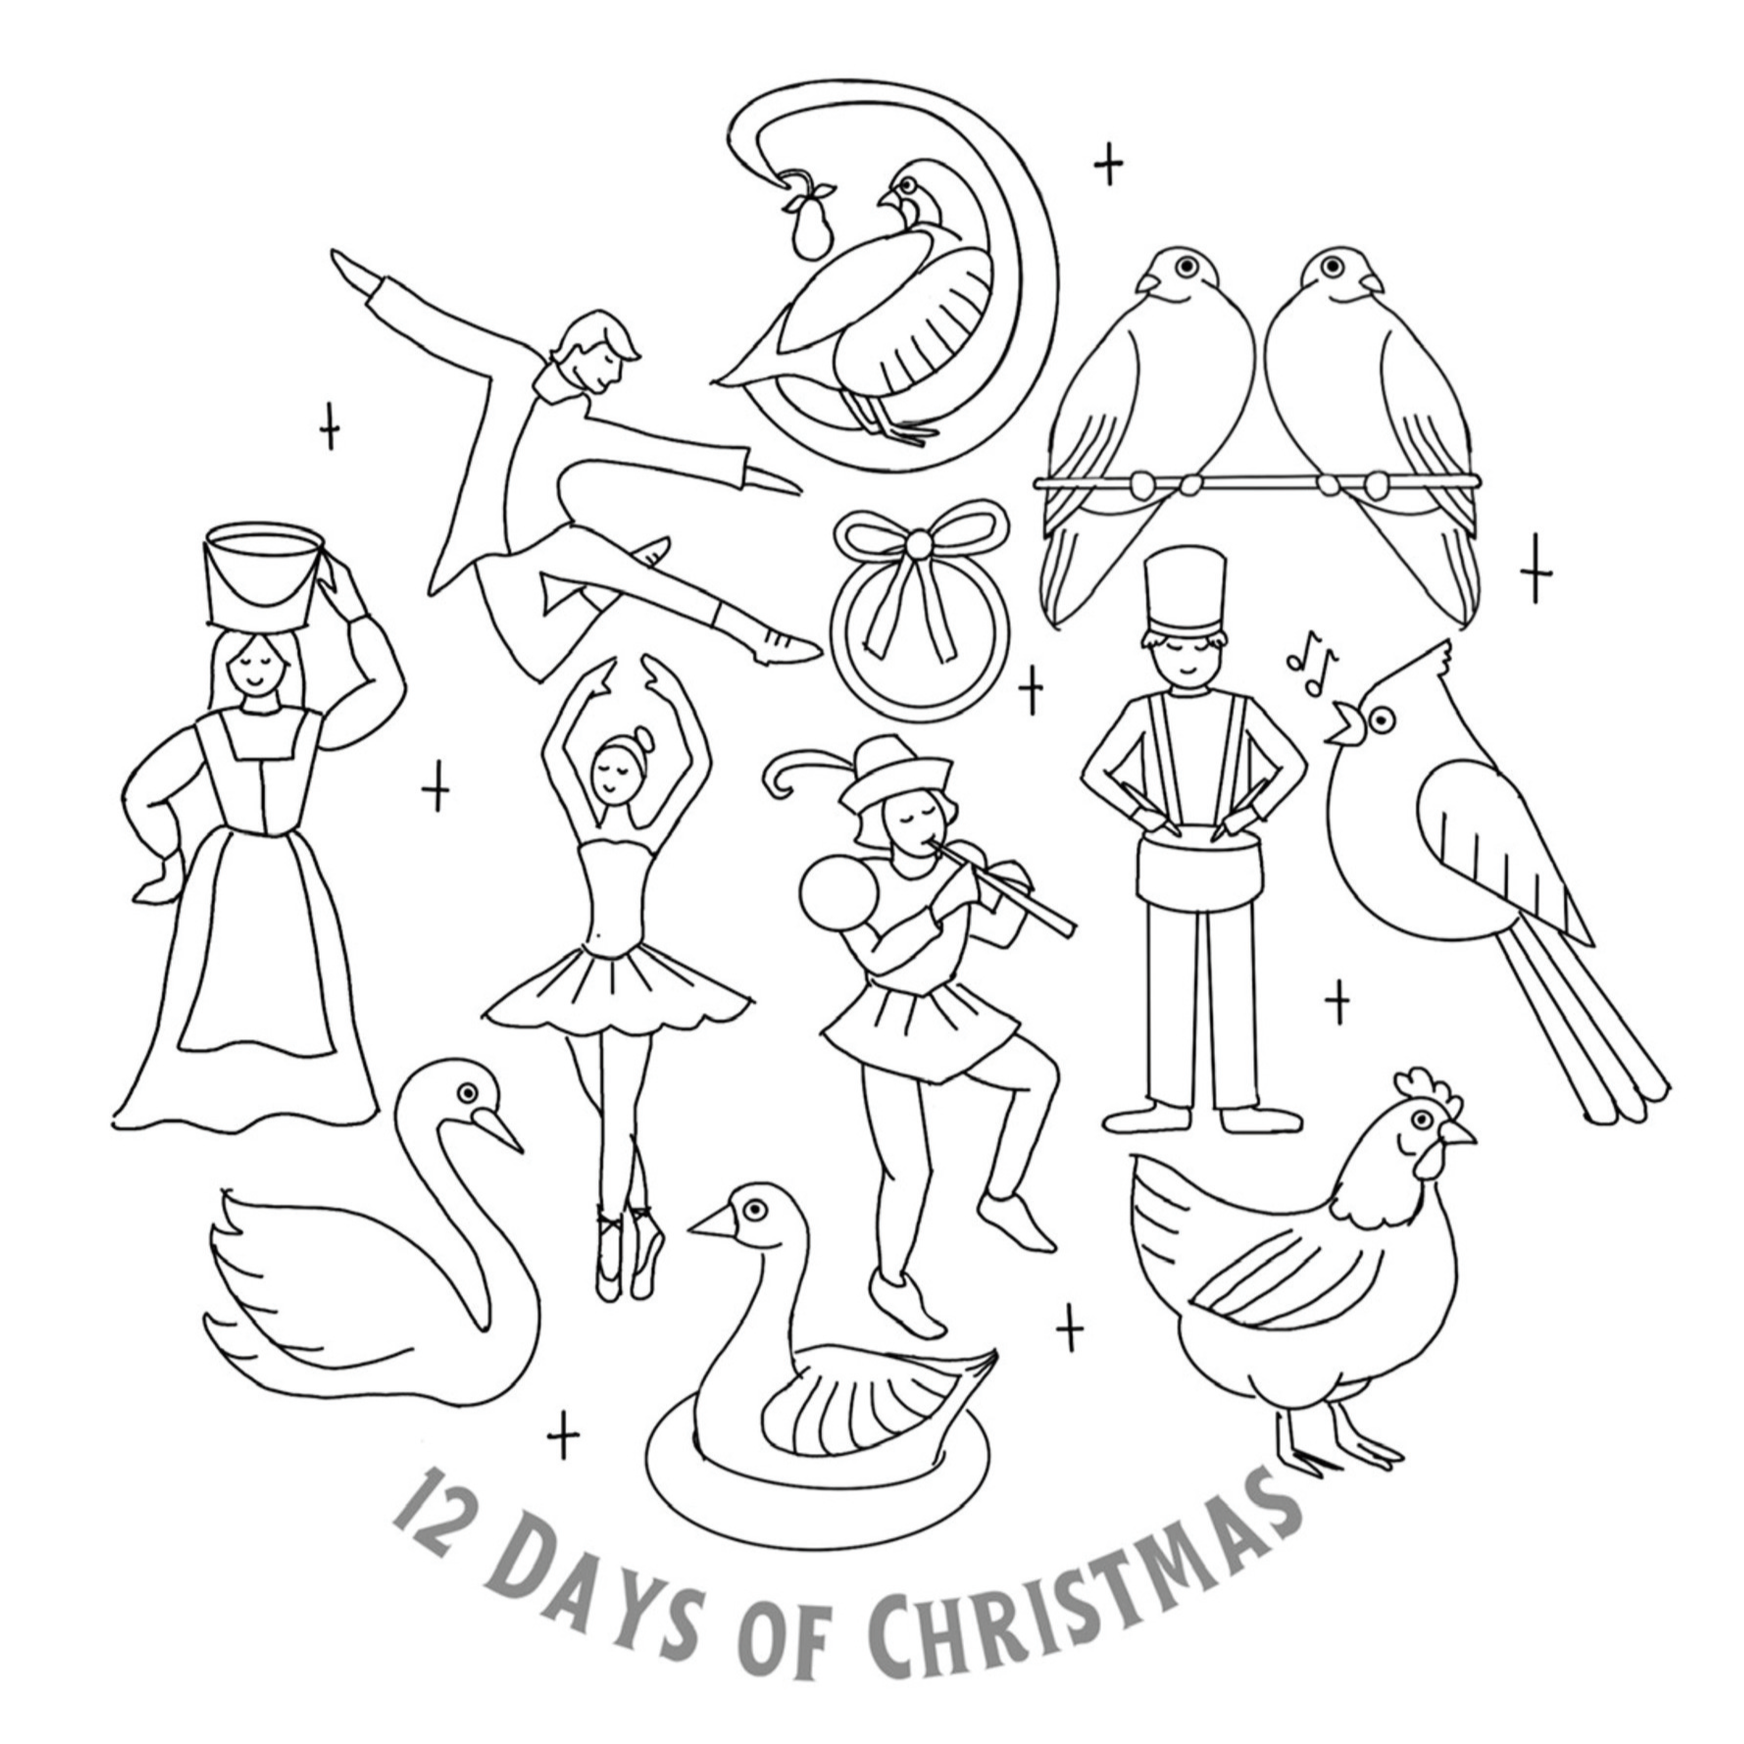
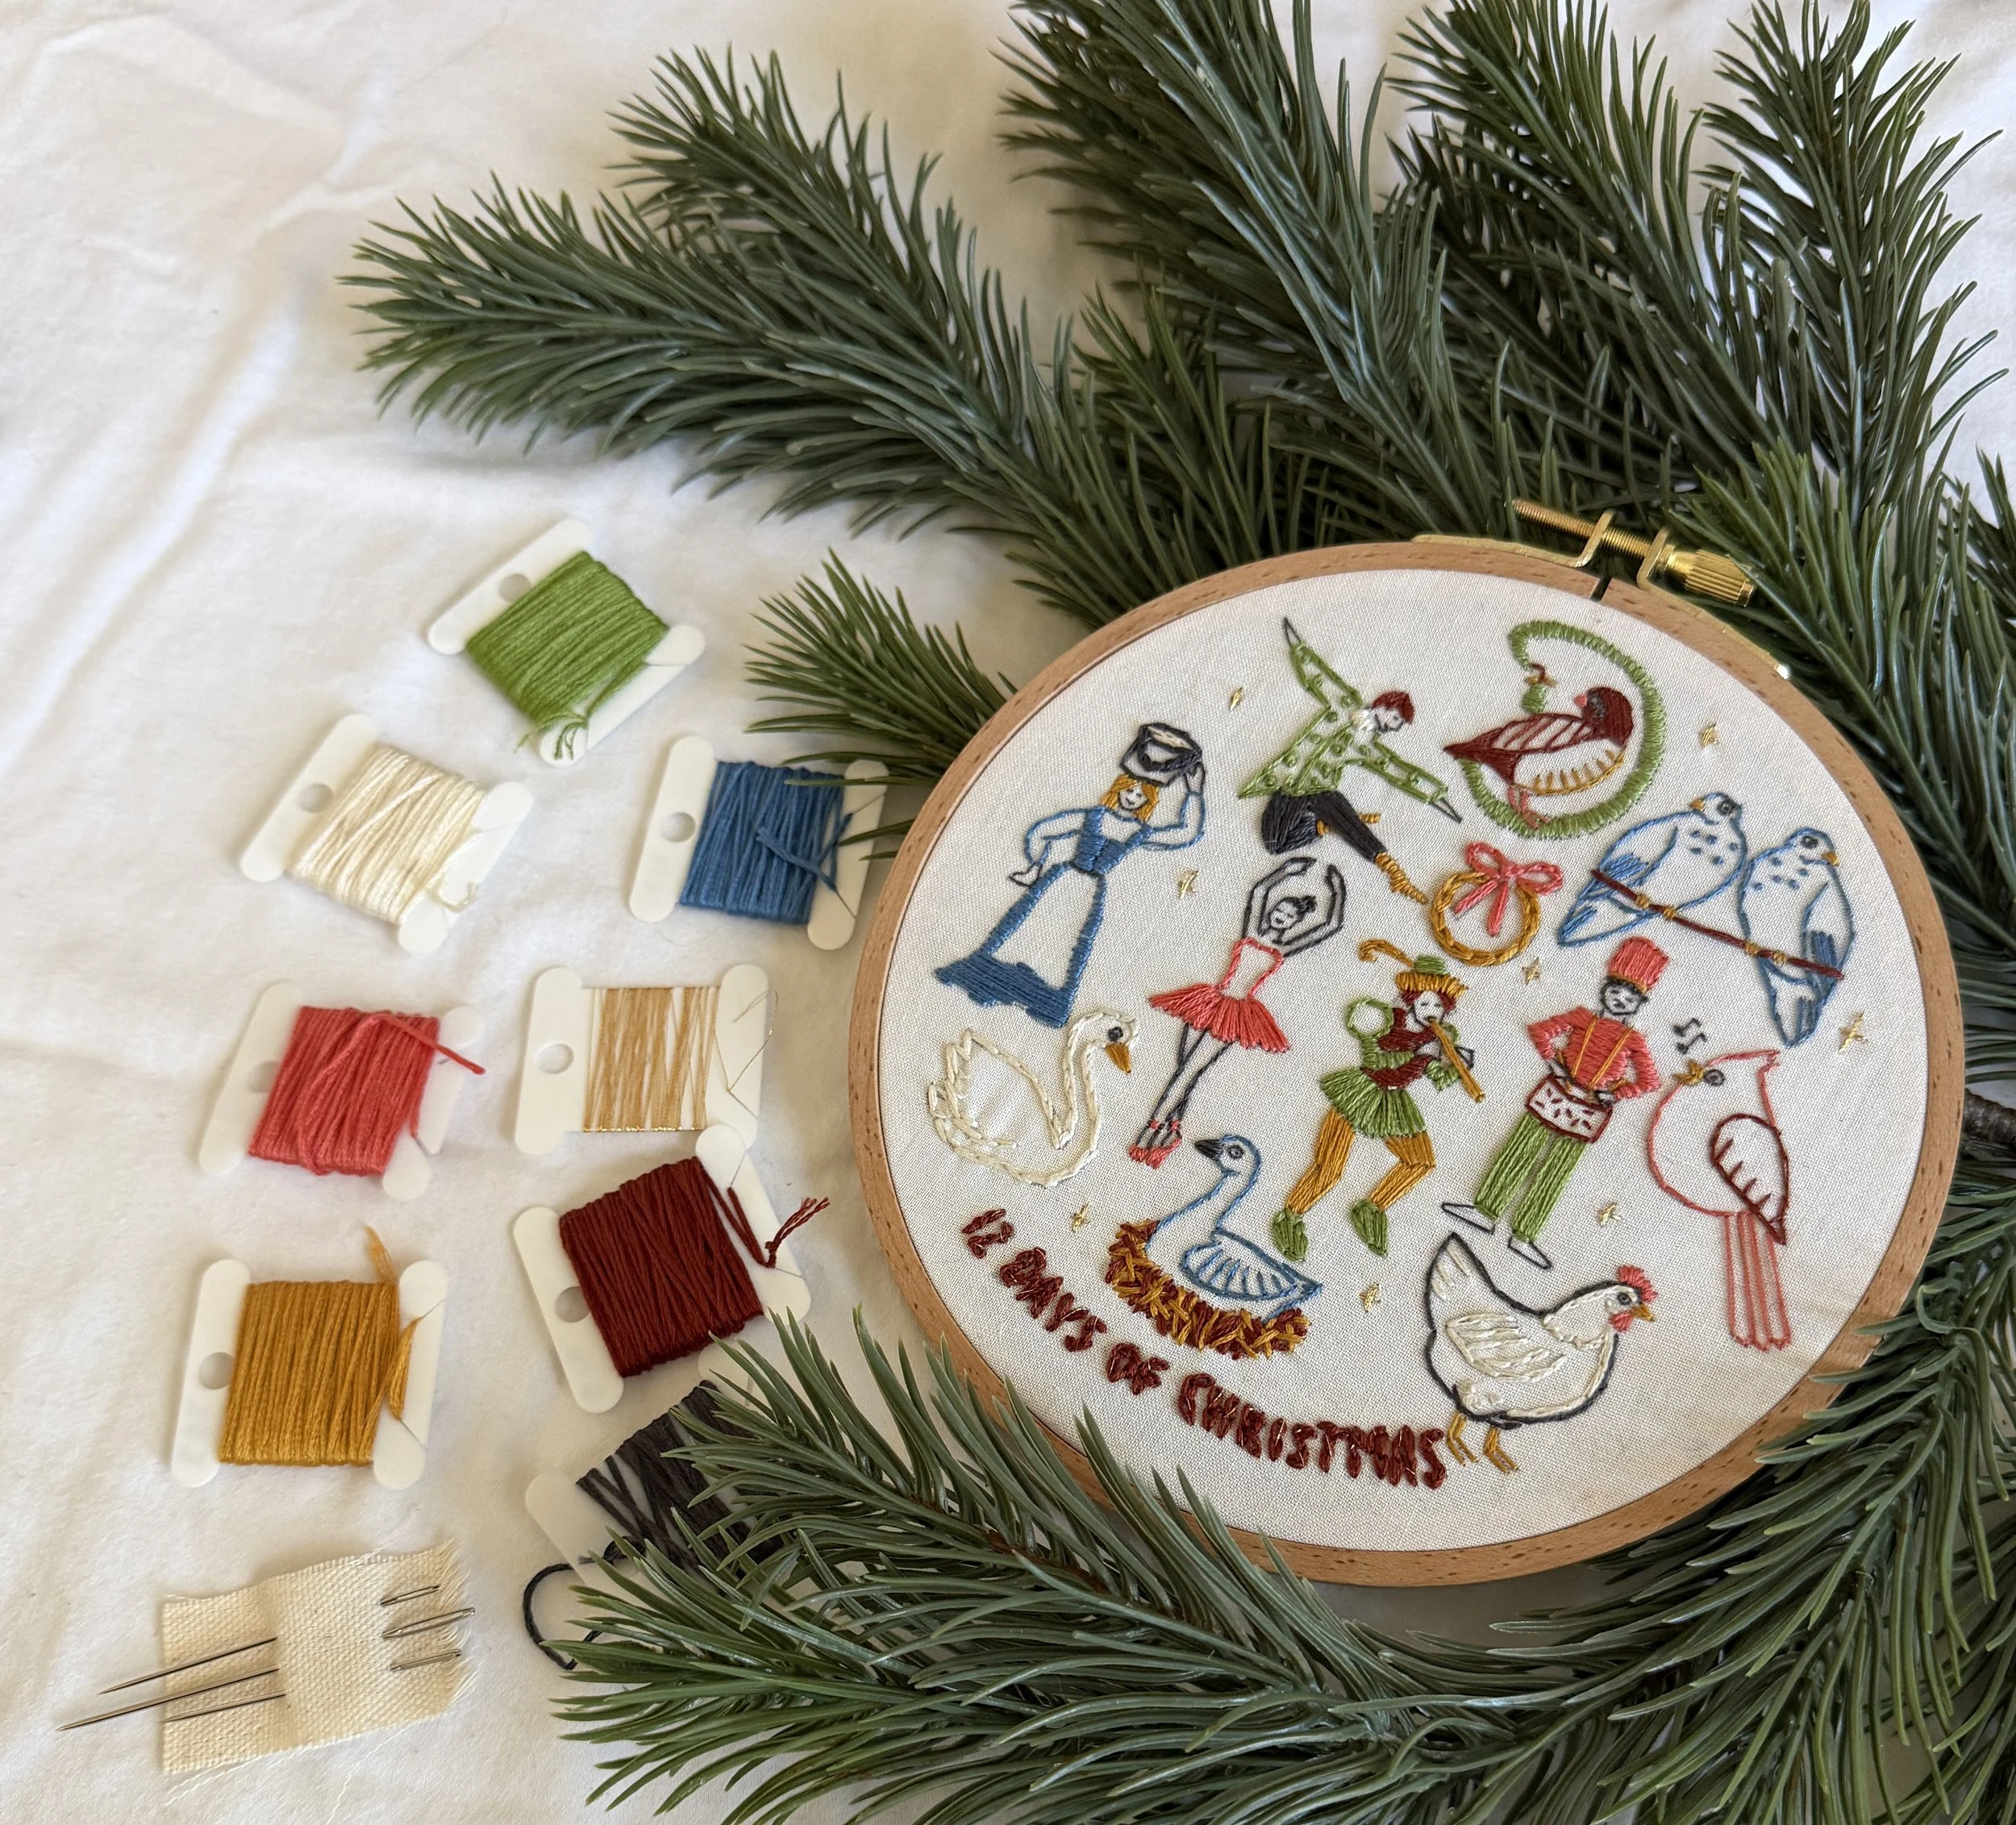
How to Stitch the Design
There is no wrong way to fill out this piece! But I recommend tacking one “Day of Christmas” design each day, beginning with — you guessed it — a partridge. Below, you’ll find instructions for a suggested way to complete each these designs, along with a close up photo to see the details, but feel free to change things up and get creative! Use different colors, stitch styles, and lines.
Jump to: First, Second, Third, Fourth, Fifth, Sixth, Seventh, Eighth, Ninth, Tenth, Eleventh, Twelfth
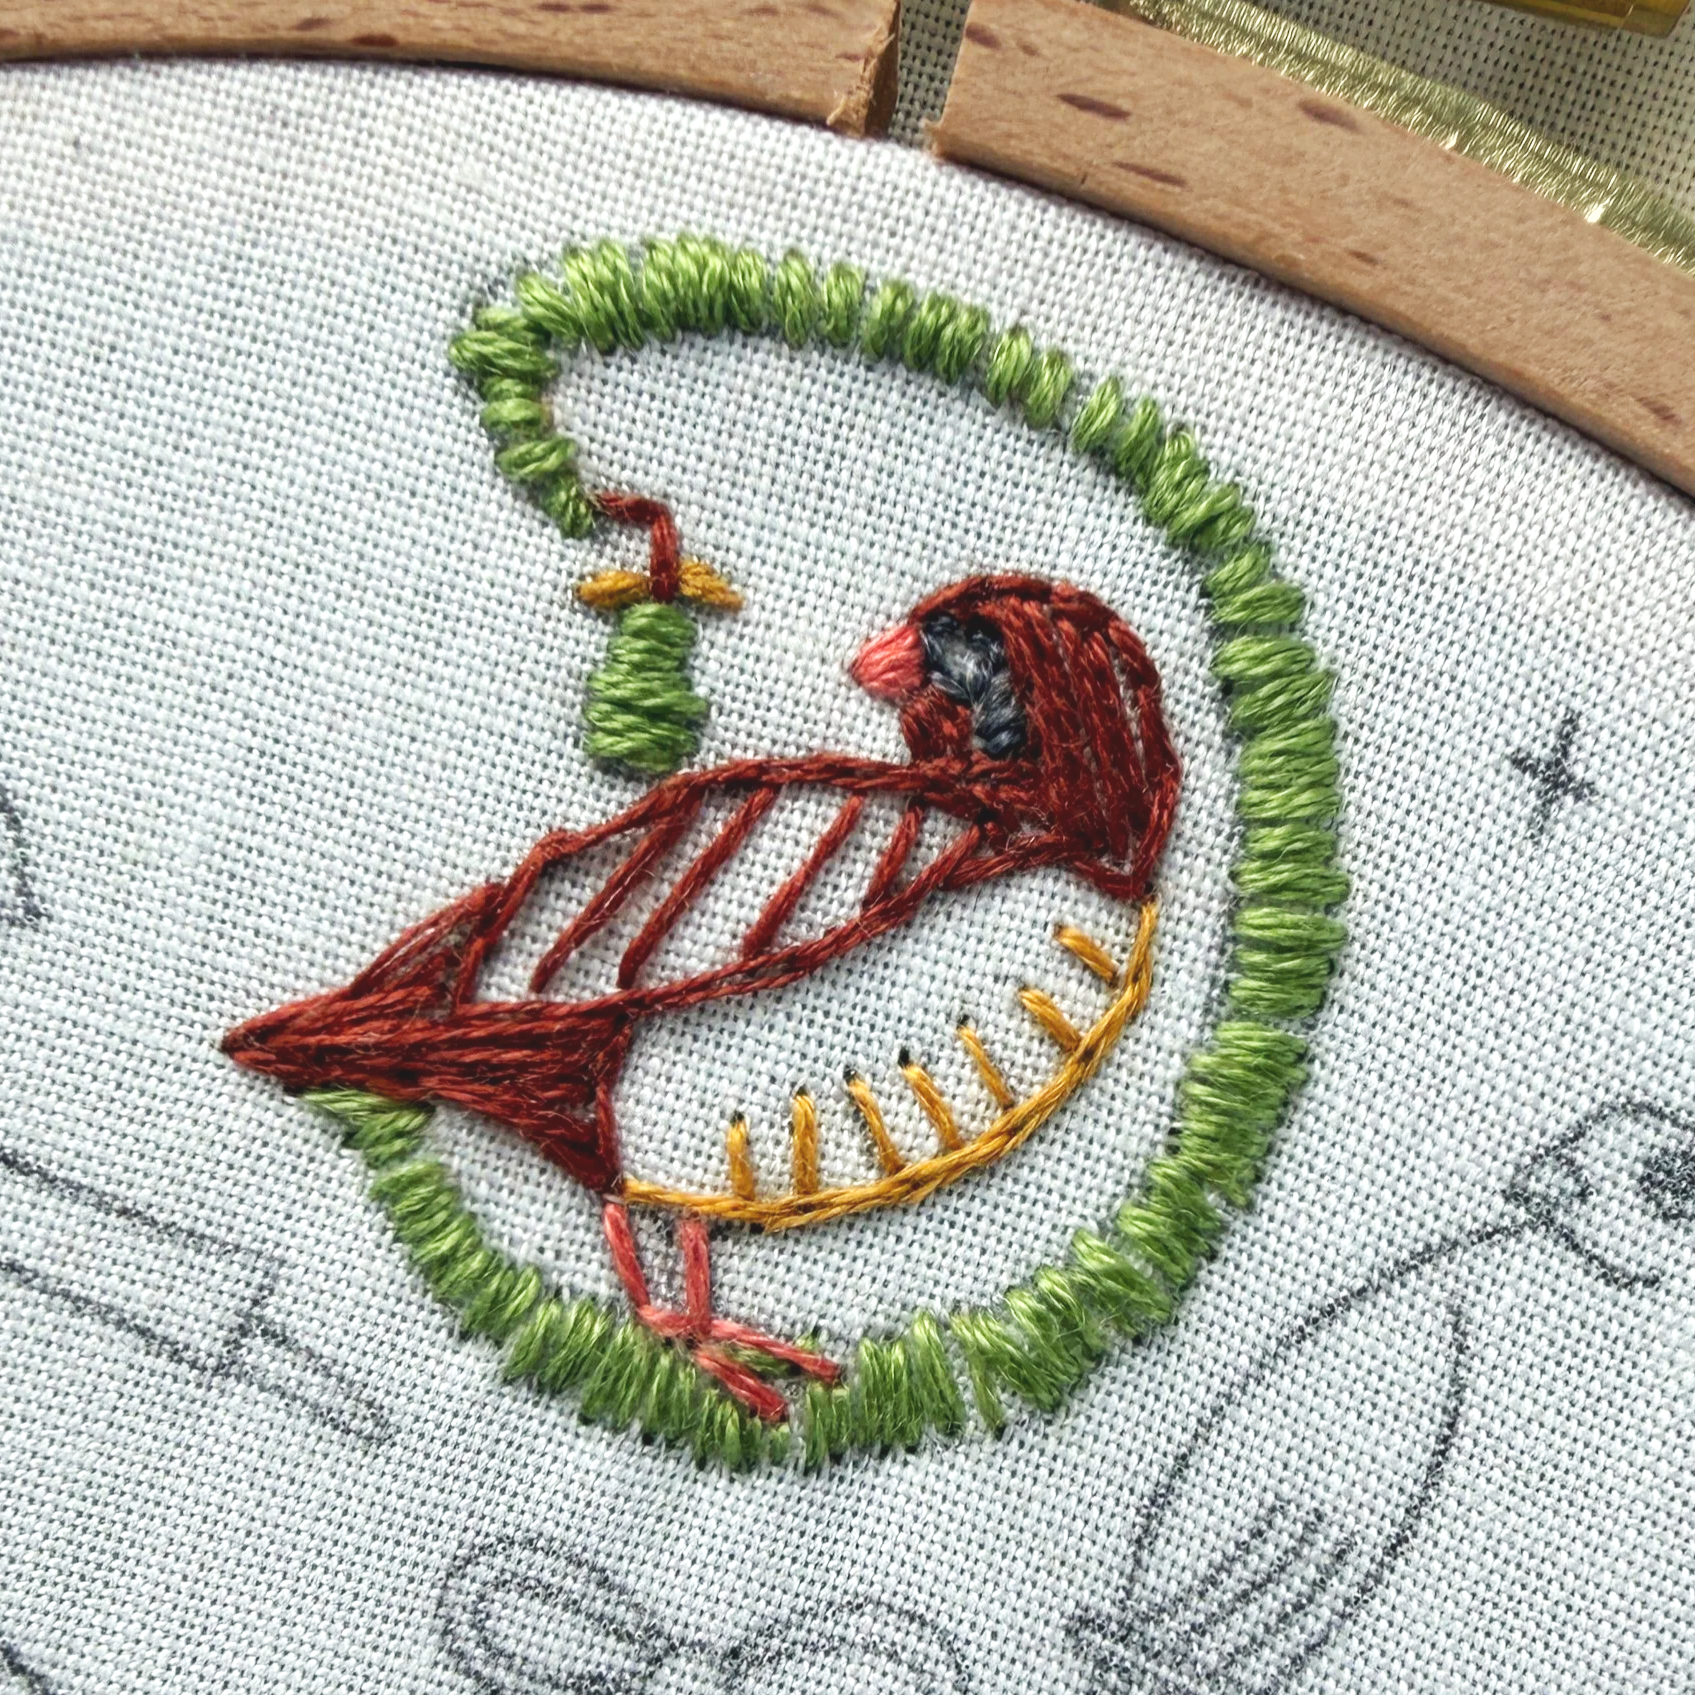
First Day of Christmas
A Partridge in a Pear Tree
Use 1-2 strands of 920 to outline the brown parts of the bird using split stitch. Then, fill in the brown sections using satin stitch and lines. Outline the pear stem as well.
Use 1-2 strands of 783 to outline the belly using split stitch, and the pear leaves using satin stitch.
Use 1-2 strands of 351 to outline the legs using split stitch, and the beak using satin stitch.
Us 1-2 strands of 413 to fill in the eye area using satin stitch. Use 1 strand to make the eye shape with split stitch, and 1 strands to make the pupil using french knot.
Use 2-3 strands of 470 to fill in the branch and pear using satin stitch.

Second Day of Christmas
Two Turtle Doves
Use 1-2 strands of 322 to outline the birds using split stitch. If you want, you can use french knot to add in some detail to the body.
Use 1-2 strands of 783 to fill in the feet and beaks using satin stitch.
Use 2-3 strands of 920 to outline the branch using straight lines.
Use 1 strand of 413 to make the eye shapes with split stitch, and 1 strand to make the pupils using french knot.
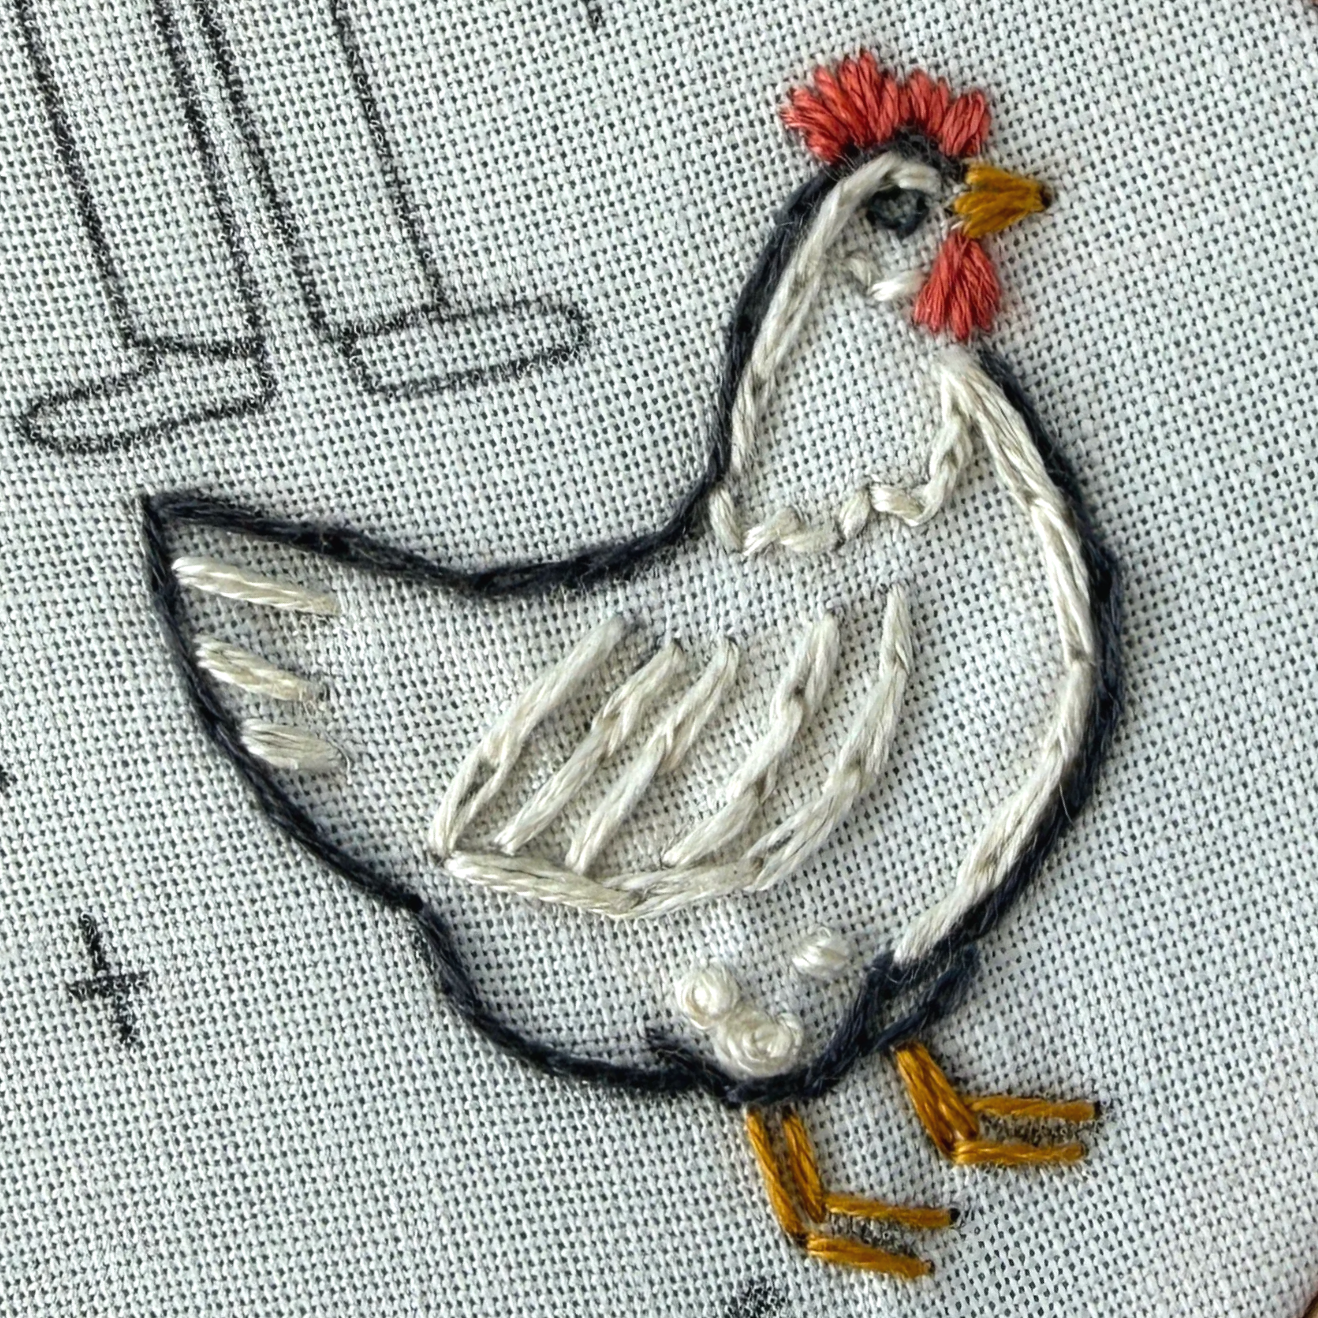
Third Day of Christmas
French Hens
Use 1-2 strands of 413 to outline the body using split stitch. Use 1 strand to make the eye shapes with split stitch, and 1 strand to make the pupils using french knot.
Use 2-3 strands of 712 to fill out the inner body detail using split stitch. If you like, add french knots by its foot as pictured.
Use 1-2 strands of 351 to fill in the hen’s red head details as pictured using satin stitch
Use 1-2 strands of 782 to fill in the beak using satin stitch, and the feet using split stitch.

Fourth Day of Christmas
Calling Birds
Use 1-2 strands of 920 to outline the wing, including the detail, using split stitch.
Use 1-2 strands of 351 to outline the remainder of the bird and its tail using split stitch and straight lines.
Use 1-2 strands of 783 to fill in the beak using satin stitch.
Use 1 strand of 413 to make the eye shape with split stitch, and 1 strand to make the pupil using french knot. Make the music notes with single lines and satin stitch.
Fifth Day of Christmas
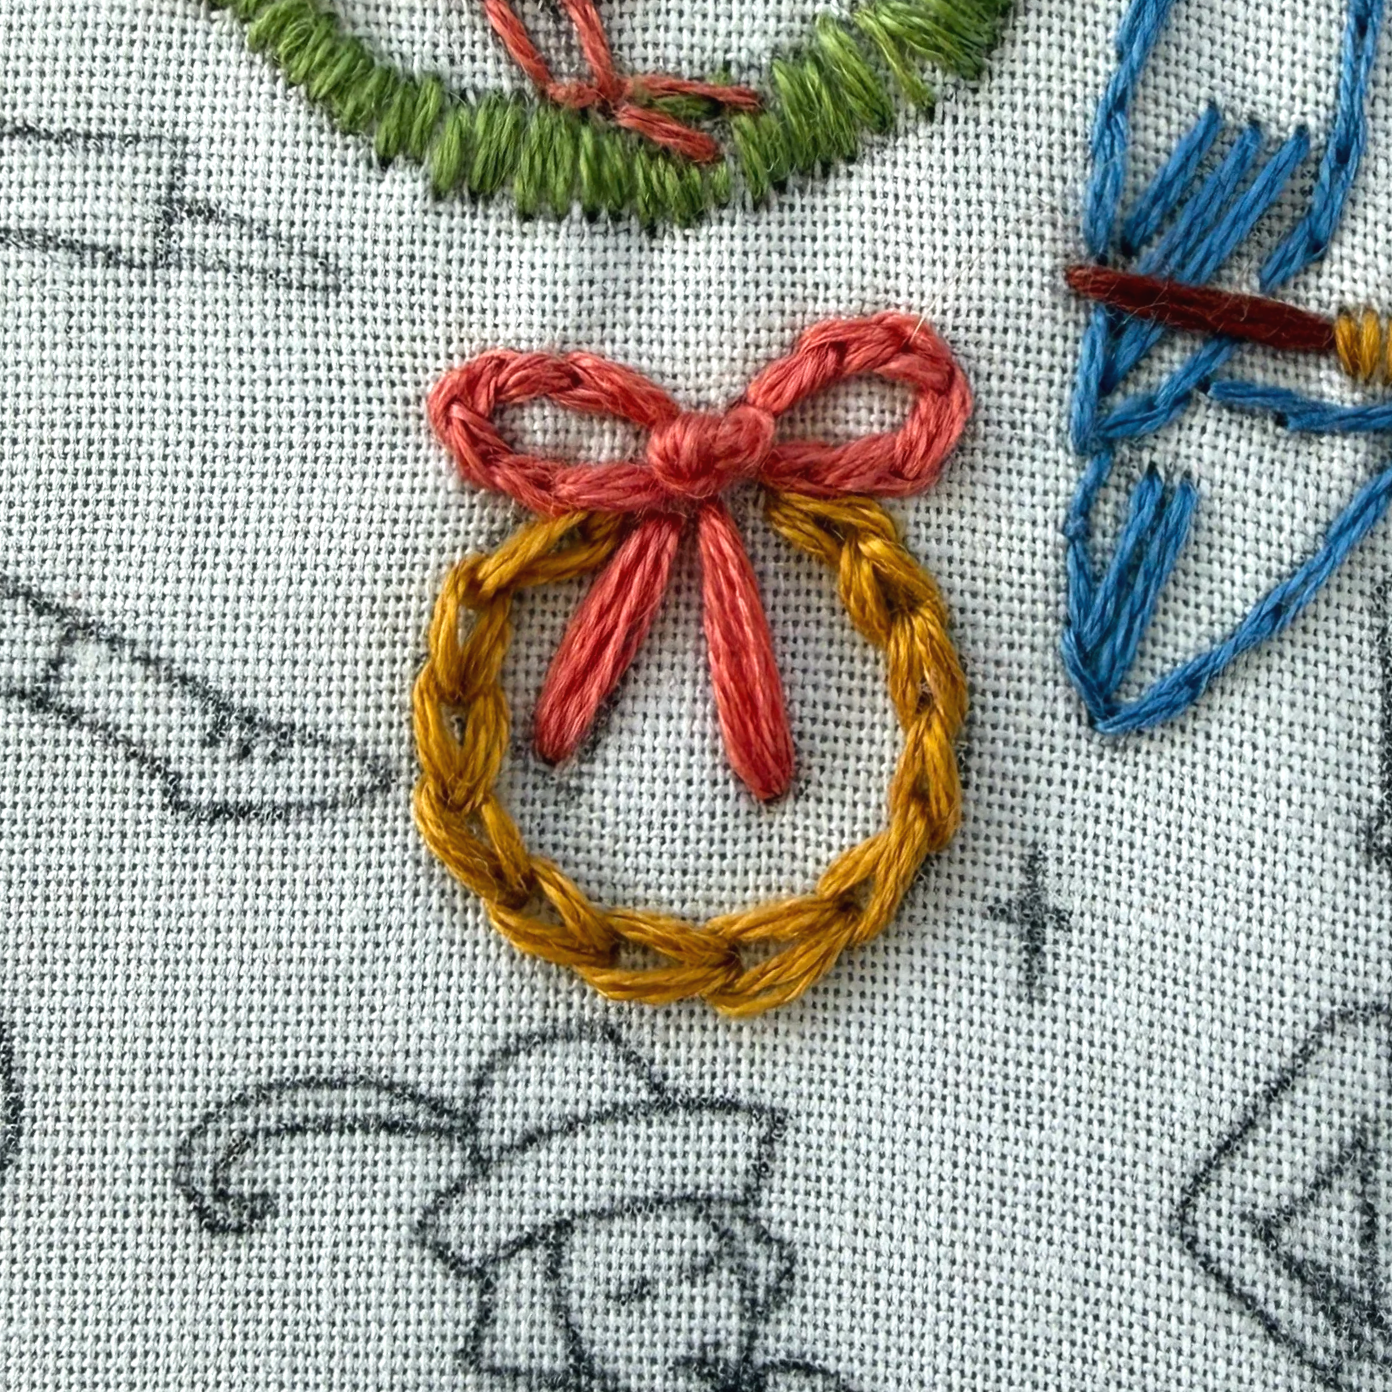
Gold Rings
Use 3-4 strands of 783 to make the circular ring using chain stitch.
Use 3-4 strands of 351 to make the bow using split stitch for the loops, straight lines for the parts hanging down, and french knot for the center.
Sixth Day of Christmas
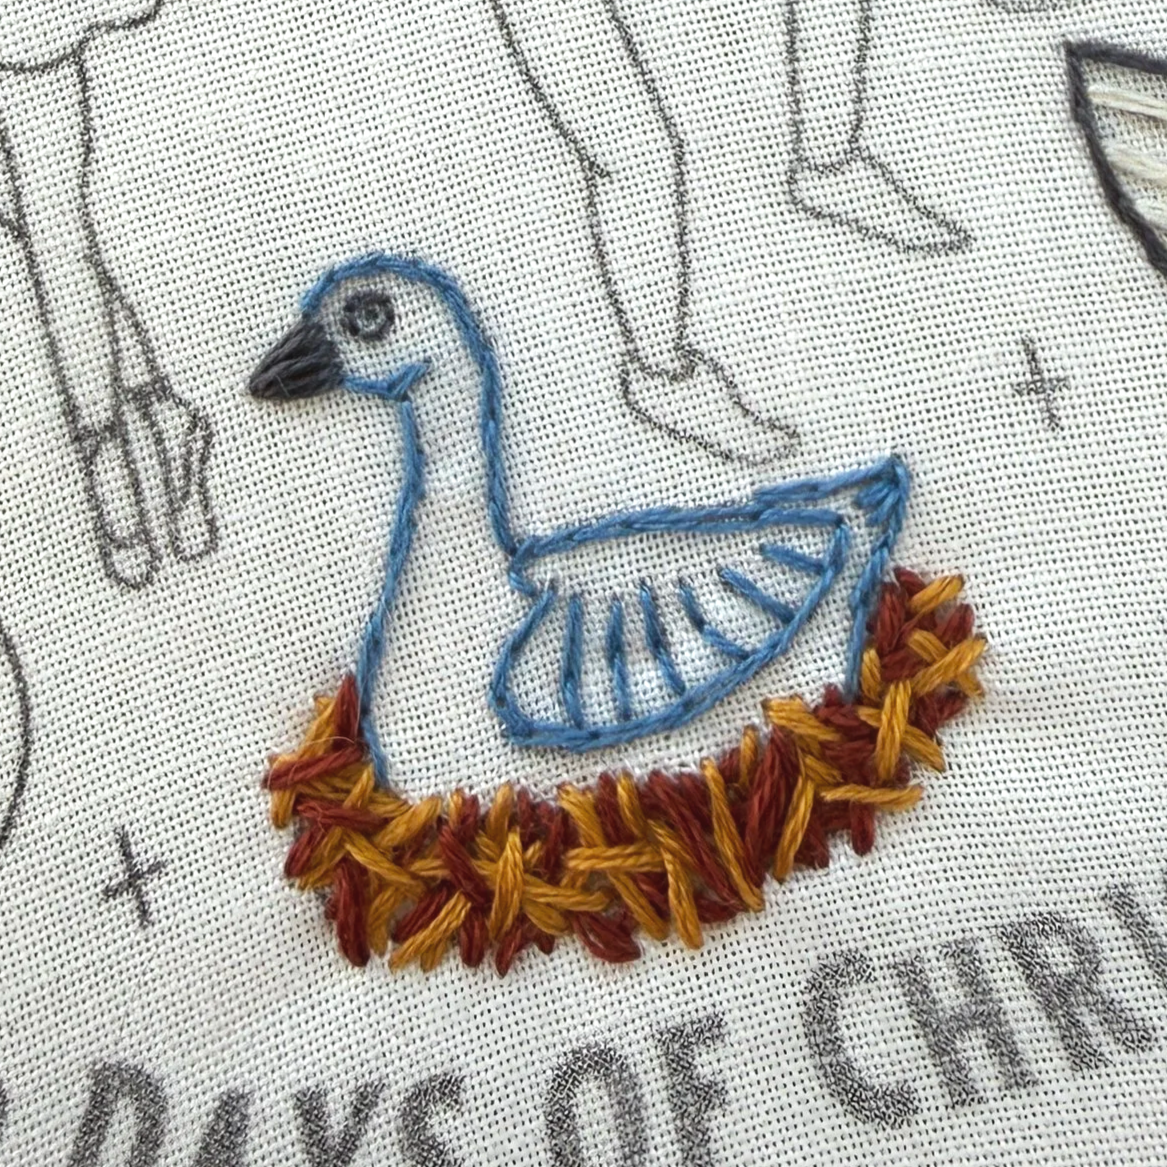
Geese A-Laying
Use 1-2 strands of 322 to outline the goose as well as its wing detail using split stitch.
Use 1 strand of 413 to make the eye shape with split stitch, and 1 strand to make the pupil using french knot. Use 1-2 strands to fill in the beak using satin stitch.
Use 2-3 strands of 920 and 783 to create the nest using seed stitch. These randomized stitches should overlap to fill in the shape.
Seventh Day of Christmas
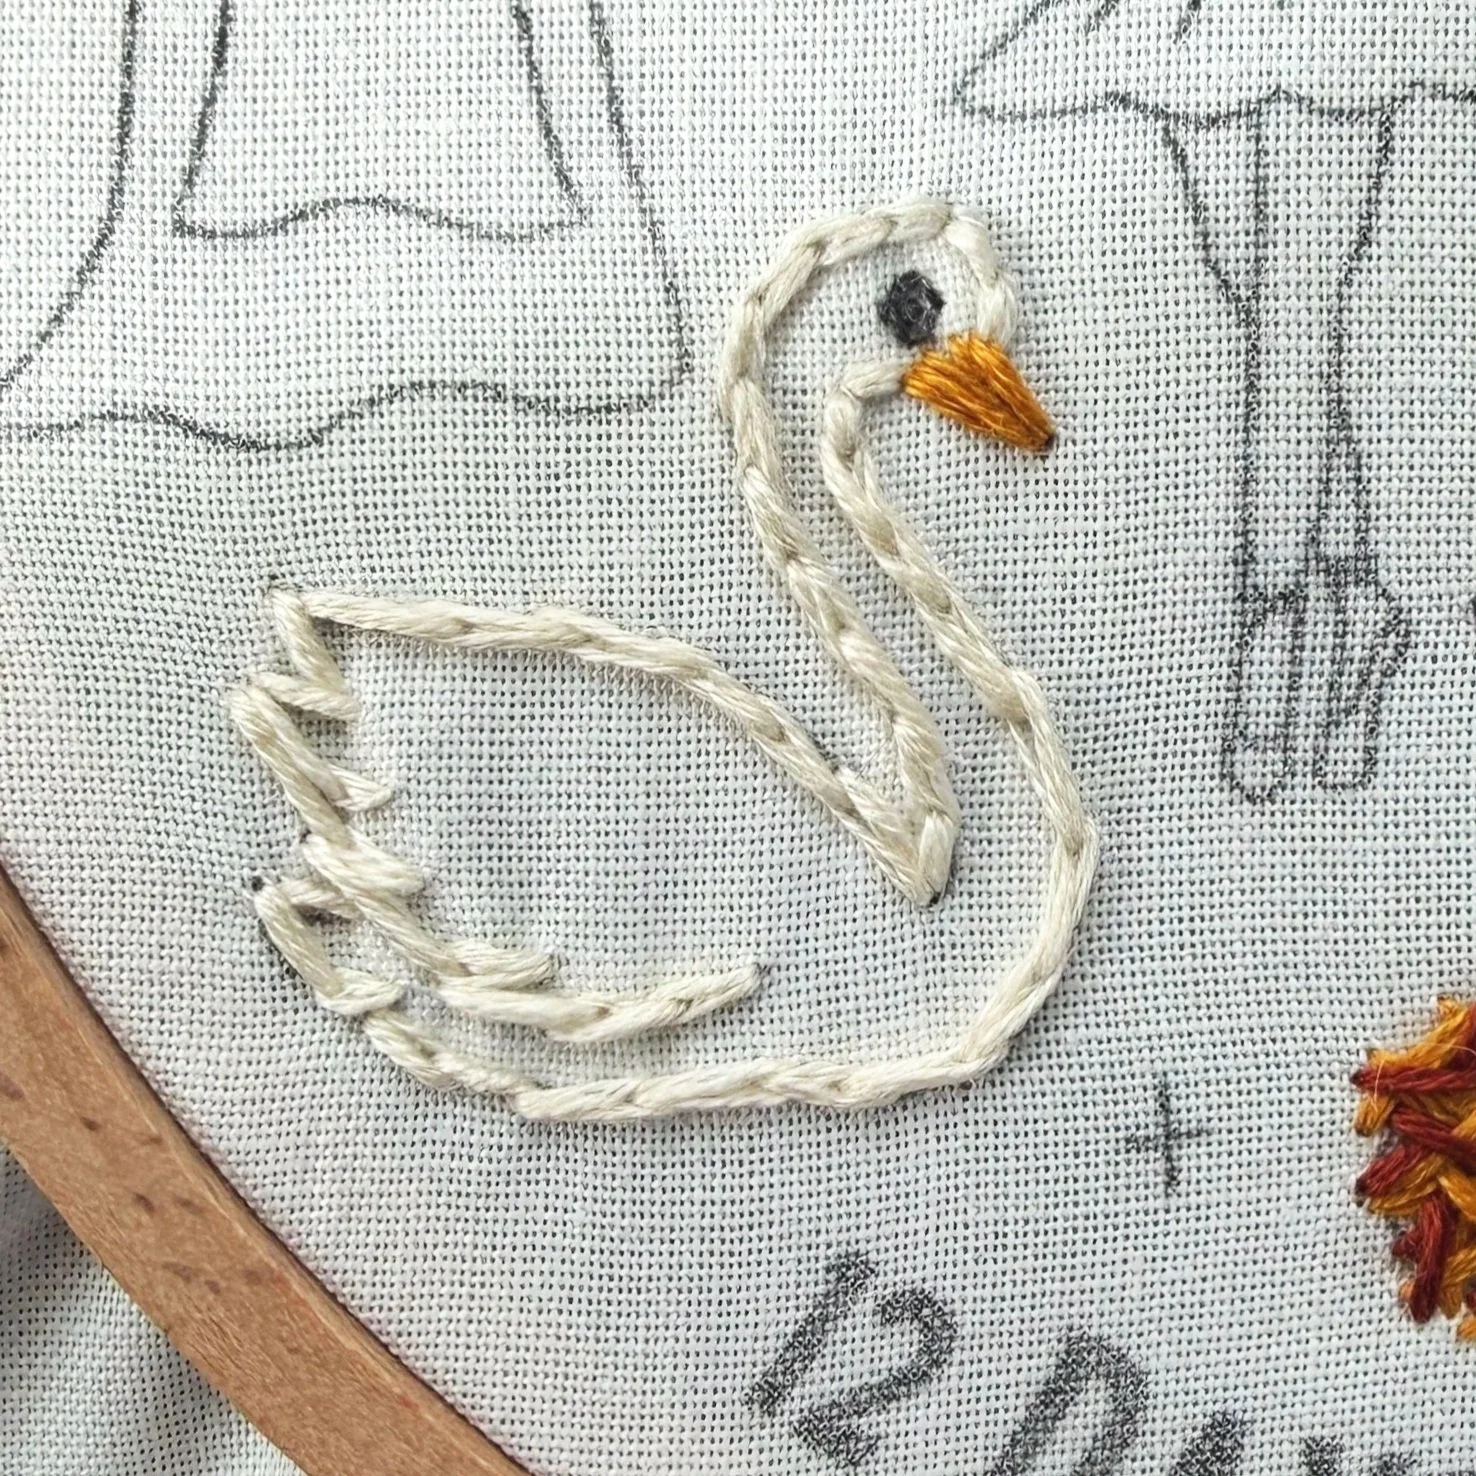
Swans A-Swimming
Use 3-4 strands of 712 to outline the body and its detail using split stitch.
Use 1-2 strands of 783 to fill in the beak using satin stitch.
Use 1 strand of 413 to make the eye shape with split stitch, and 1 strand to make the pupil using french knot.
Eighth Day of Christmas
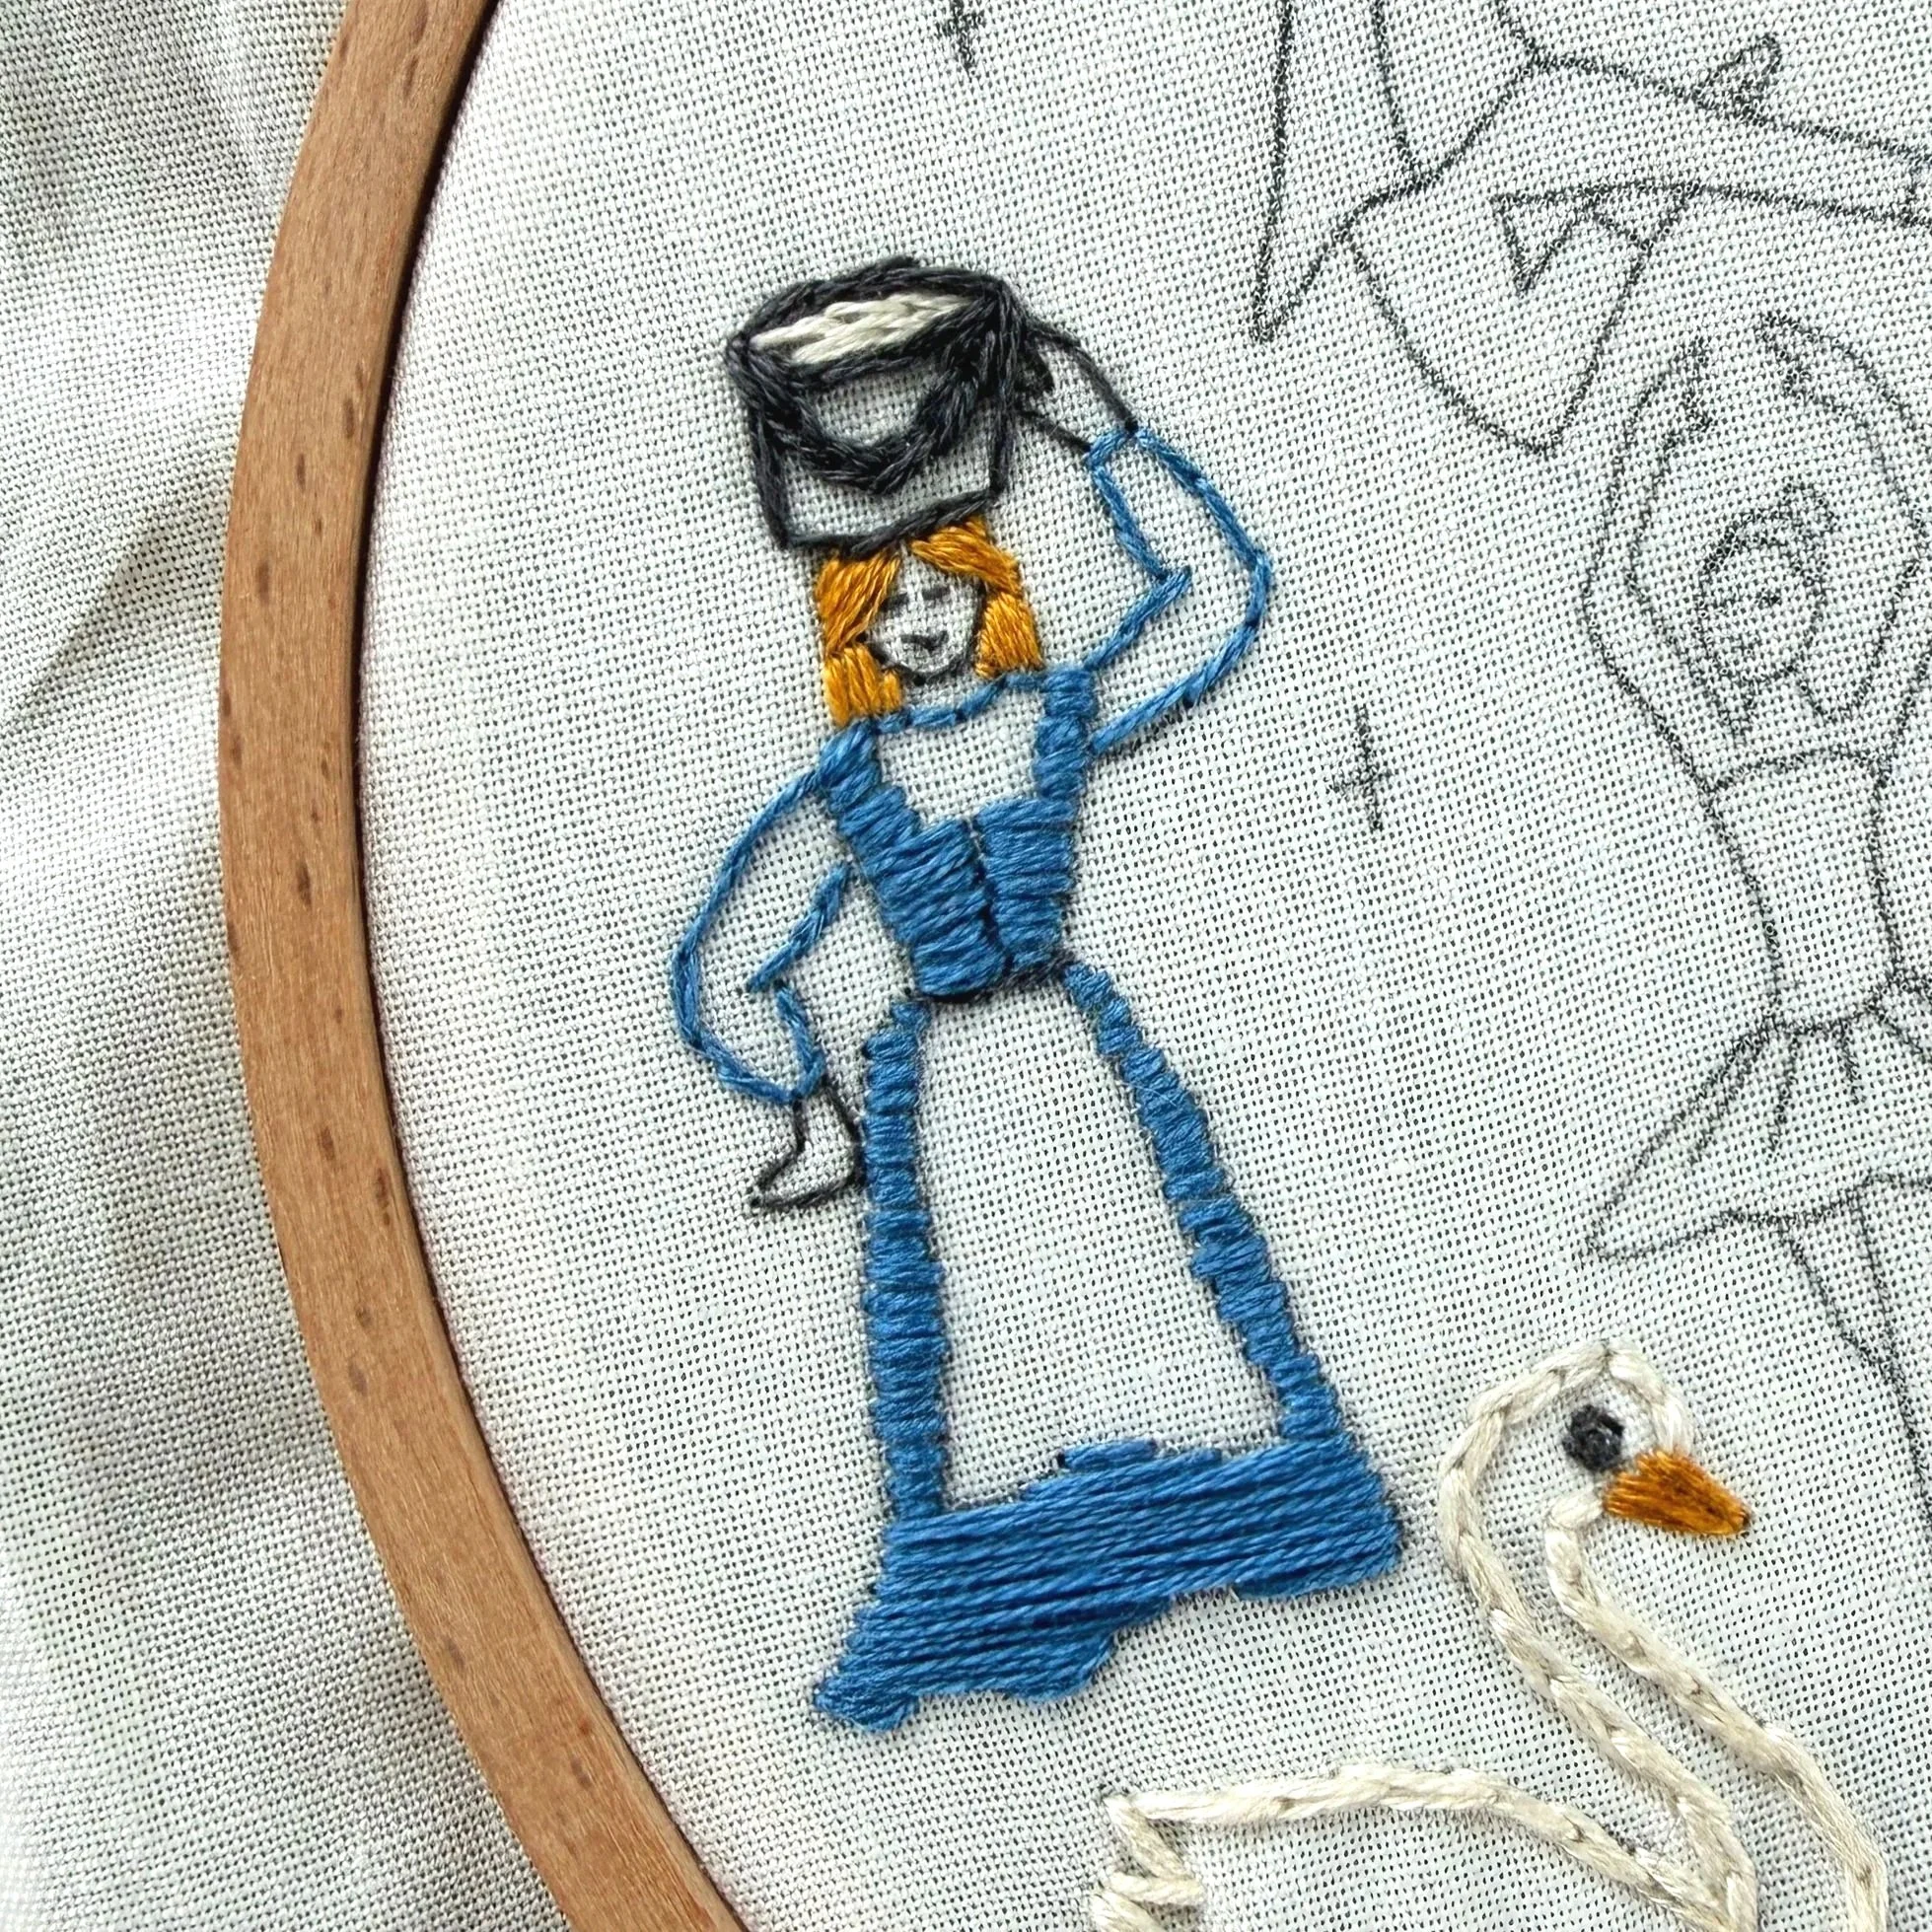
Maids A-Milking
Use 2-3 strands of 322 to fill in the dress. bodice and skirt using satin stitch.
Use 1-2 strands of 783 to fill in the hair using satin stitch.
Use 2-3 strands of 413 to outline the pail handle using chain stitch. Using 1-2 strands, outline the remainder of the pail, the hands, and the face and mouth and eyes using split stitch.
Use 2-3 strands of 712 to fill in the milk in the pail using split stitch.

Ninth Day of Christmas
Ladies Dancing
Use 2-3 strands of 351 to fill in the tutu using satin stitch. Then, outline the leotard bodice using split stitch. Fill in and outline the shoes and their ribbons as well.
Use 1-2 strands of 413 to outline the legs, arms, and face using split stitch. Fill in the bun and hair using satin stitch.

Tenth Day of Christmas
Lords A-Leaping
Use 2-3 strands of 470 to outline the jacket with split stitch, and fill it in with french knots.
Use 2-3 strands of 413 to fill in the pants using satin stitch. Use 1 strand to outline the hands and face.
Use 2-3 strands of 783 to fill in the boots using satin stitch
Use 2-3 strands of 712 to fill in the ascot using satin stitch.
Use 2-3 strands of 920 to fill in the hair using satin stitch.
Eleventh Day of Christmas
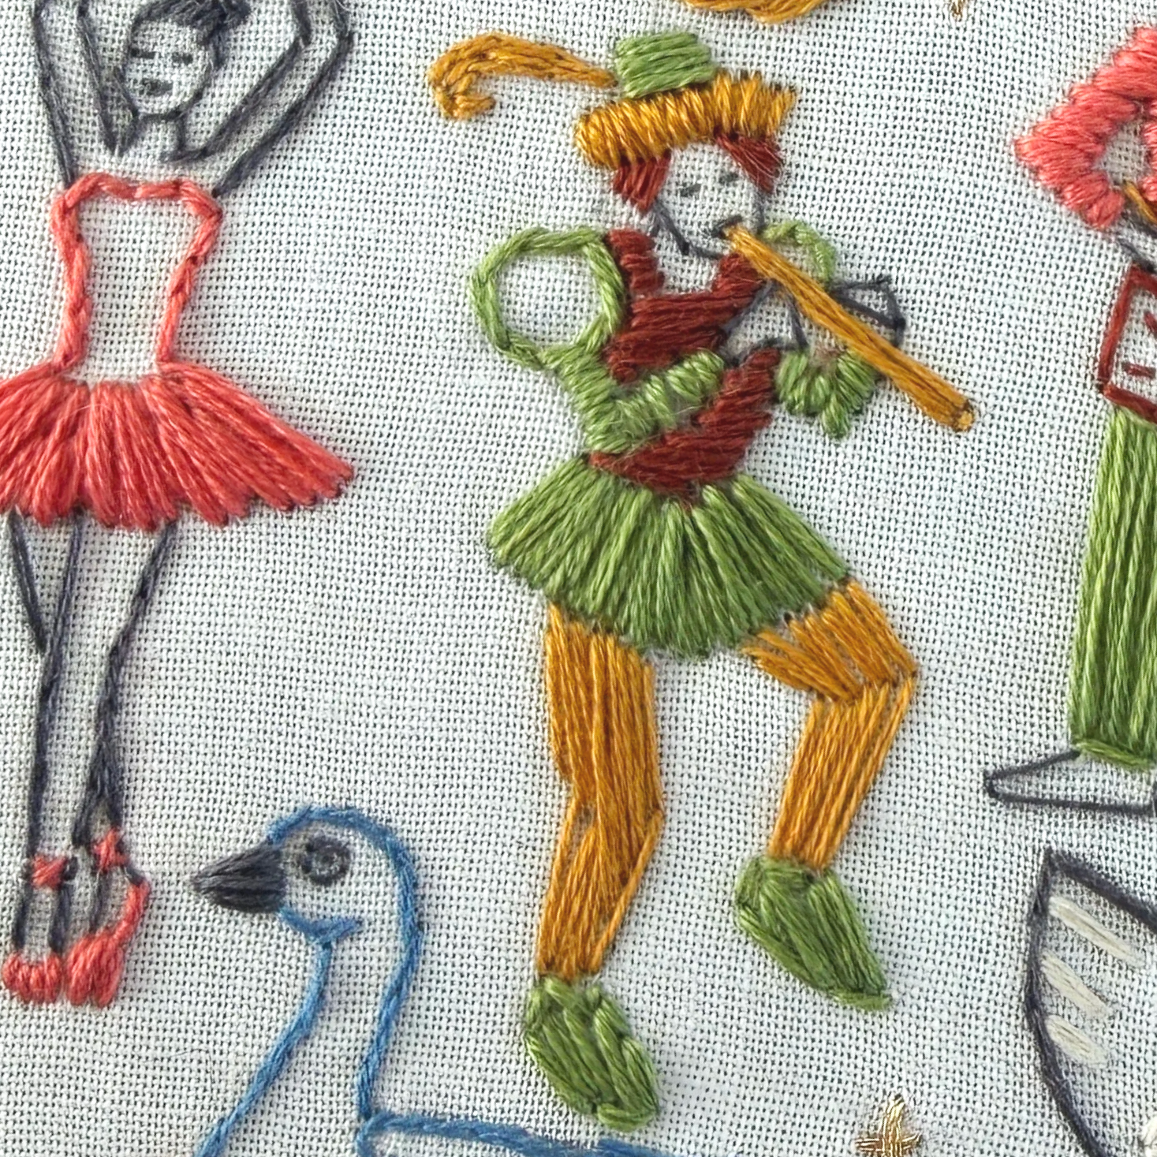
Pipers Piping
Begin with 1-2 strands of 920 to fill in the torso using satin stitch.
Use 2-3 strands of 470 to fill in the skirt and arms using satin stitch, and the puffy sleeves using split stitch. Fill in the feed using split stitch and satin stitch, as well as the middle portion of the hat using satin stitch.
Use 2-3 strands of 738 to fill in the legs, instrument, and lower portion of the hat all using satin stitch. Fill in the feather using split stitch.
Use 1-2 strands of 413 to outline the face and its features, as well as the hands.
Twelfth Day of Christmas
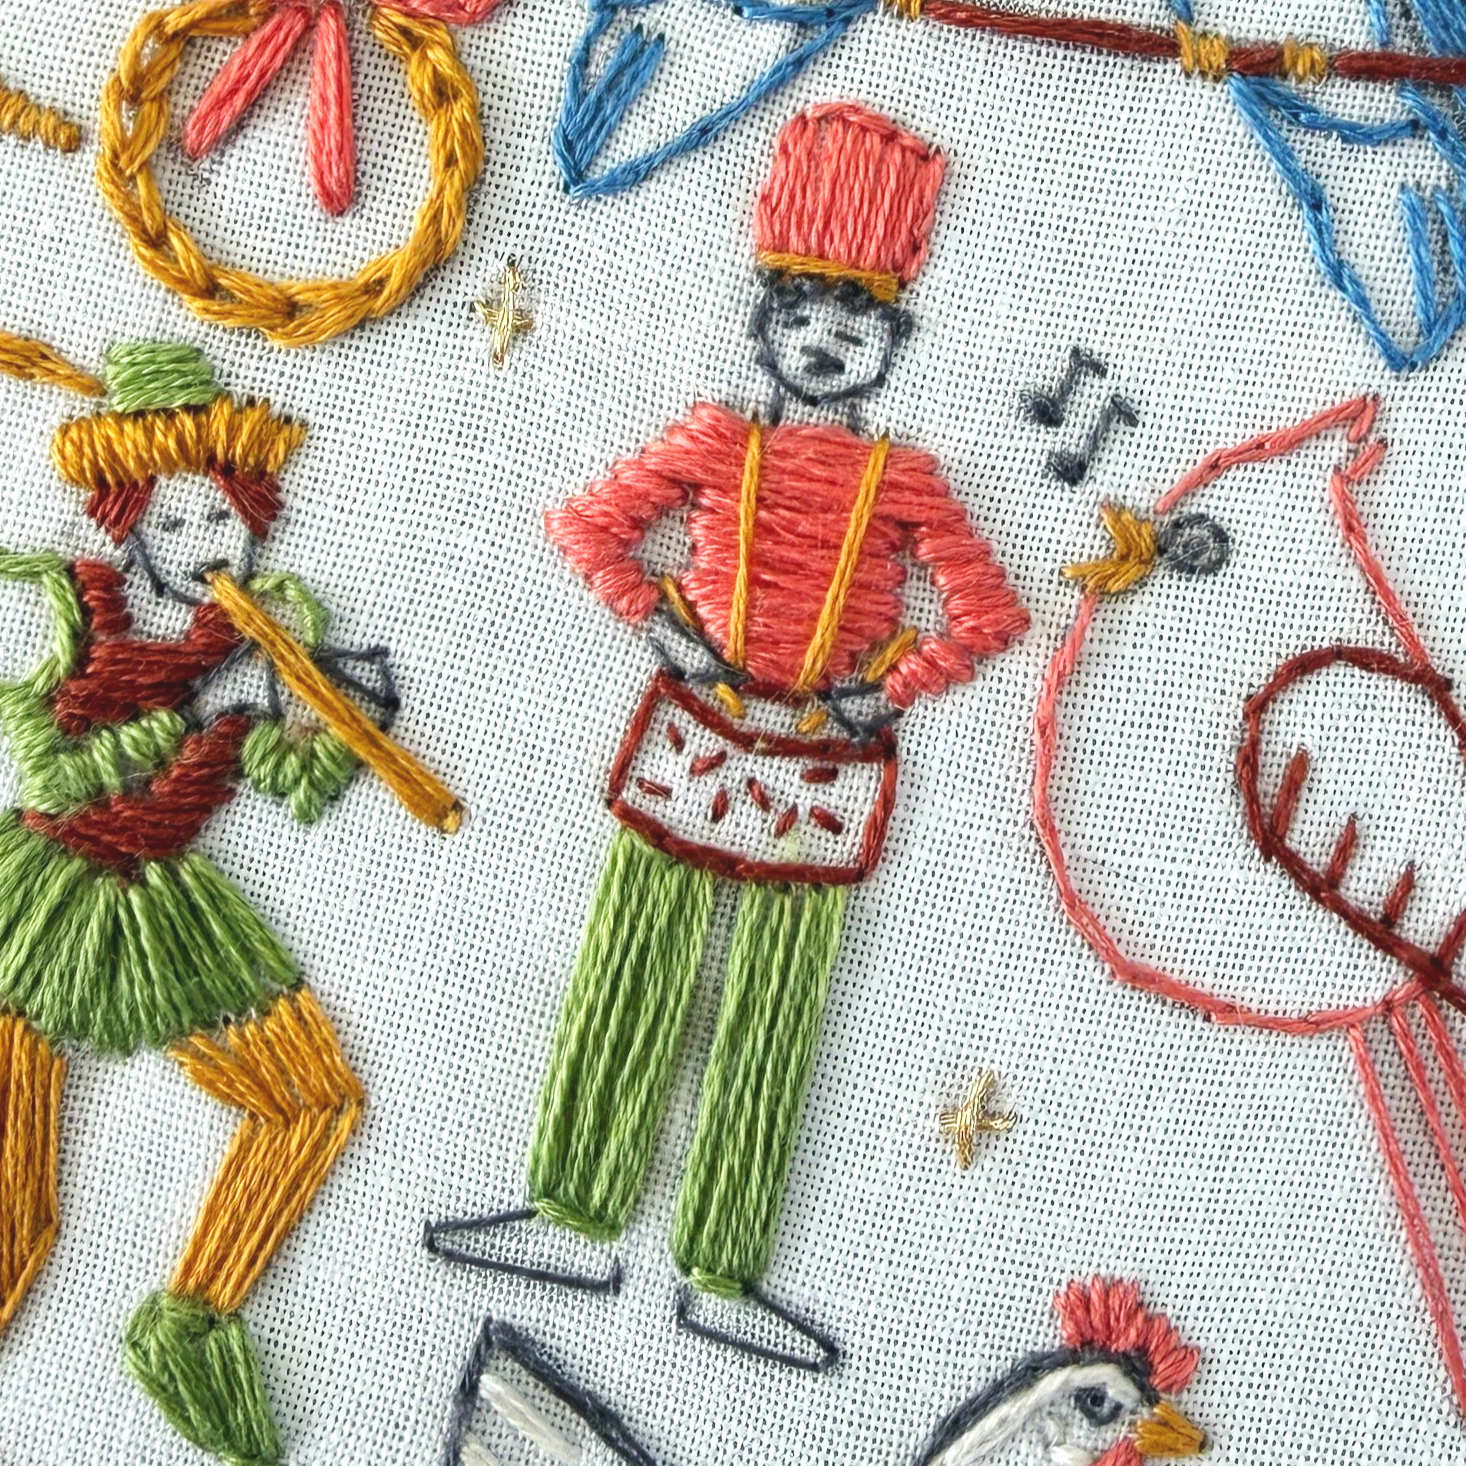
Drummers Drumming
Use 1-2 strands of 351 to fill in the shirt and hat using satin stitch.
Use 1-2 strands of 470 to fill in the legs using satin stitch.
Use 1-2 strands of 920 to outline the drum using split stitch, and add in detail using seed stitch.
Use 1-2 strands of 413 to outline the face, hands, and feet using split stitch. Use 2-3 strands to create the hair using french knot.
Use 2-3 strands of 783 to add the suspenders and the brim of the hat using straight stitches and/or split stitch. Finish by adding in the drumsticks around the hand shapes.
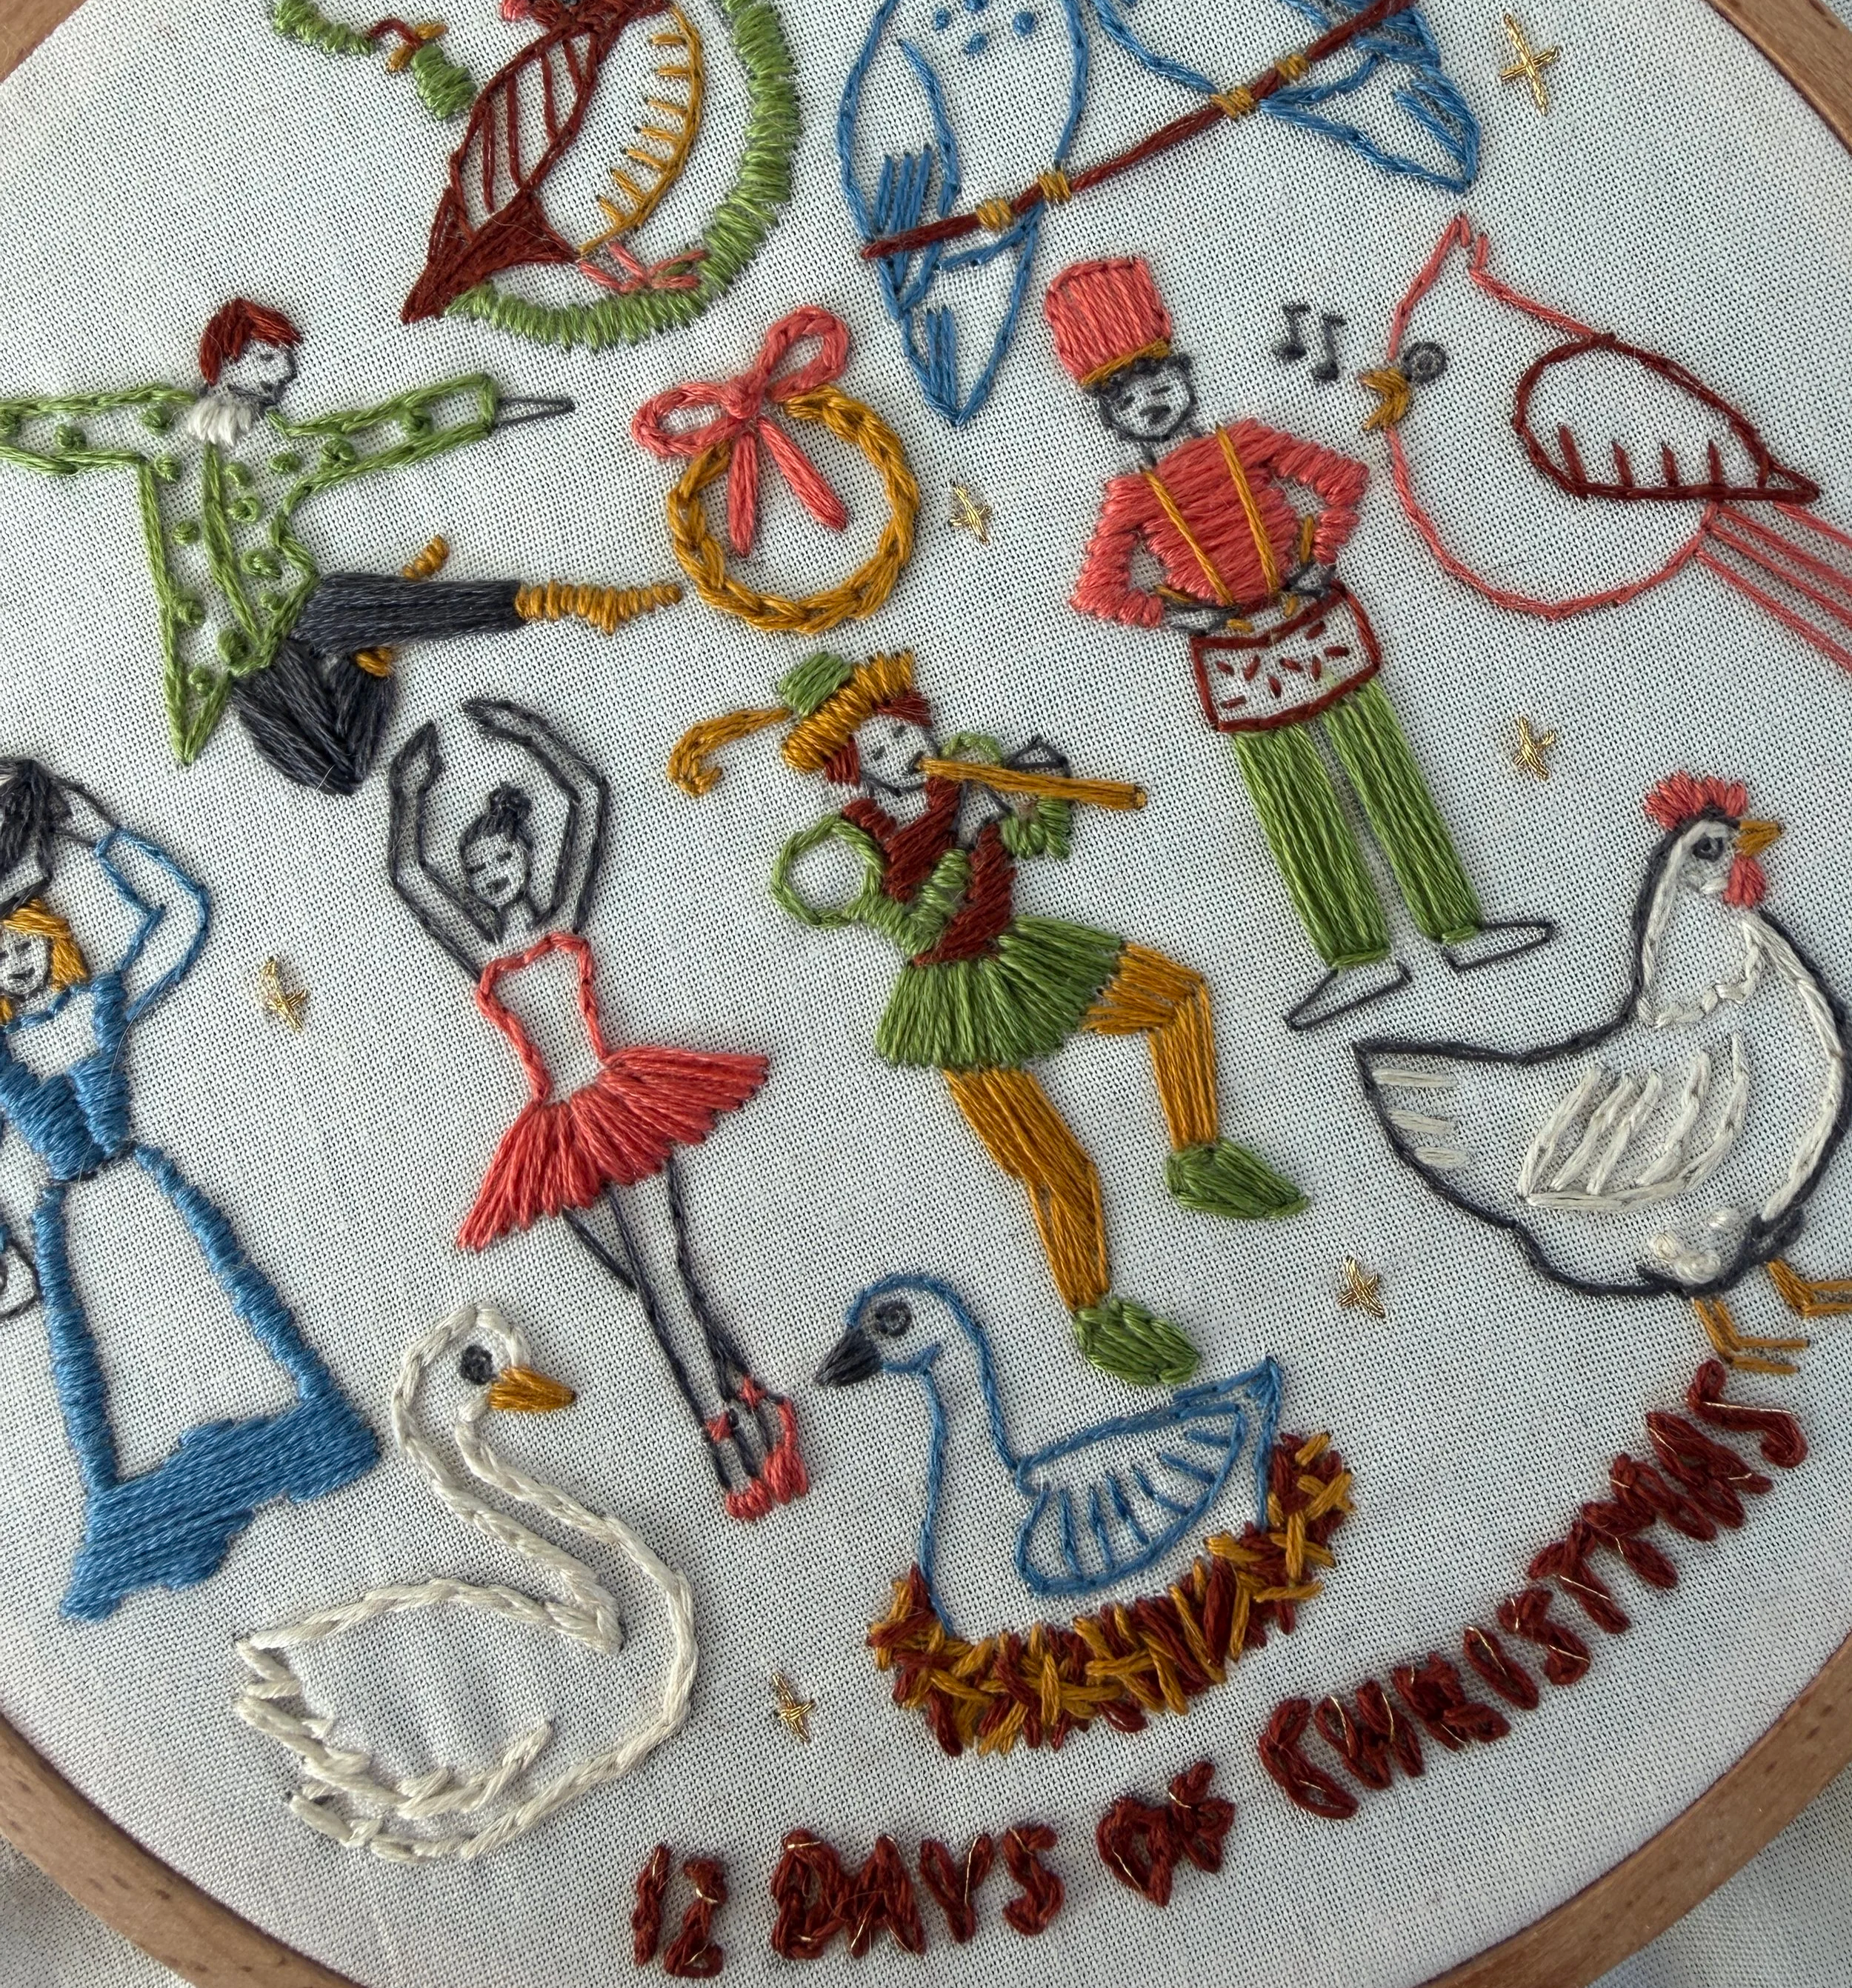
Final Touches…
If you haven’t already, fill out the “12 Days of Christmas” text at the bottom with 920 using chain stitch. And finally(!), be sure to use the bonus golden thread to make the stars throughout the piece, and use it to add in any other small details you like, such as hints of gold in the text at the bottom. It’s recommended to fold it over a few times to create a thicker strand, but it’s not necessary.
Finishing the Hoop
There are a number of ways to finish the back of the hoop once you’re done. One method:
Thread a needle with more than enough thread to go all the way around the circle – whatever you have leftover.
Then, using large running stitches, working about ¼ inch from the fabric edge, sew the excess cloth around the circle.
When you reach the beginning, pull both ends of thread to gather the fabric tightly and secure with a double knot.
Here’s a video for how to do this. Or if you have felt at home, consider giving this method a try!
And if you have hot glue at home, another method is to cut the excess fabric, leaving about a ¼ inch around the edge of the hoop. Then, hot glue the cut edges down along the inside hoop at the back.
Once you’re done, post a photo of your finished piece, tag @needleandspruce, and use the hashtag #needleandspruce! We love to see your creations! 🌲