Elk Meadow Embroidery Kit
Welcome!
-
△
Here, you’ll find everything you need to know to get started, to stitch the pattern, and to finish and display your completed piece.
-
△
-
△
Have questions? Explore the FAQs and don’t hesitate to reach out: needleandspruce@gmail.com.
Elk Meadow Embroidery Kit Overview
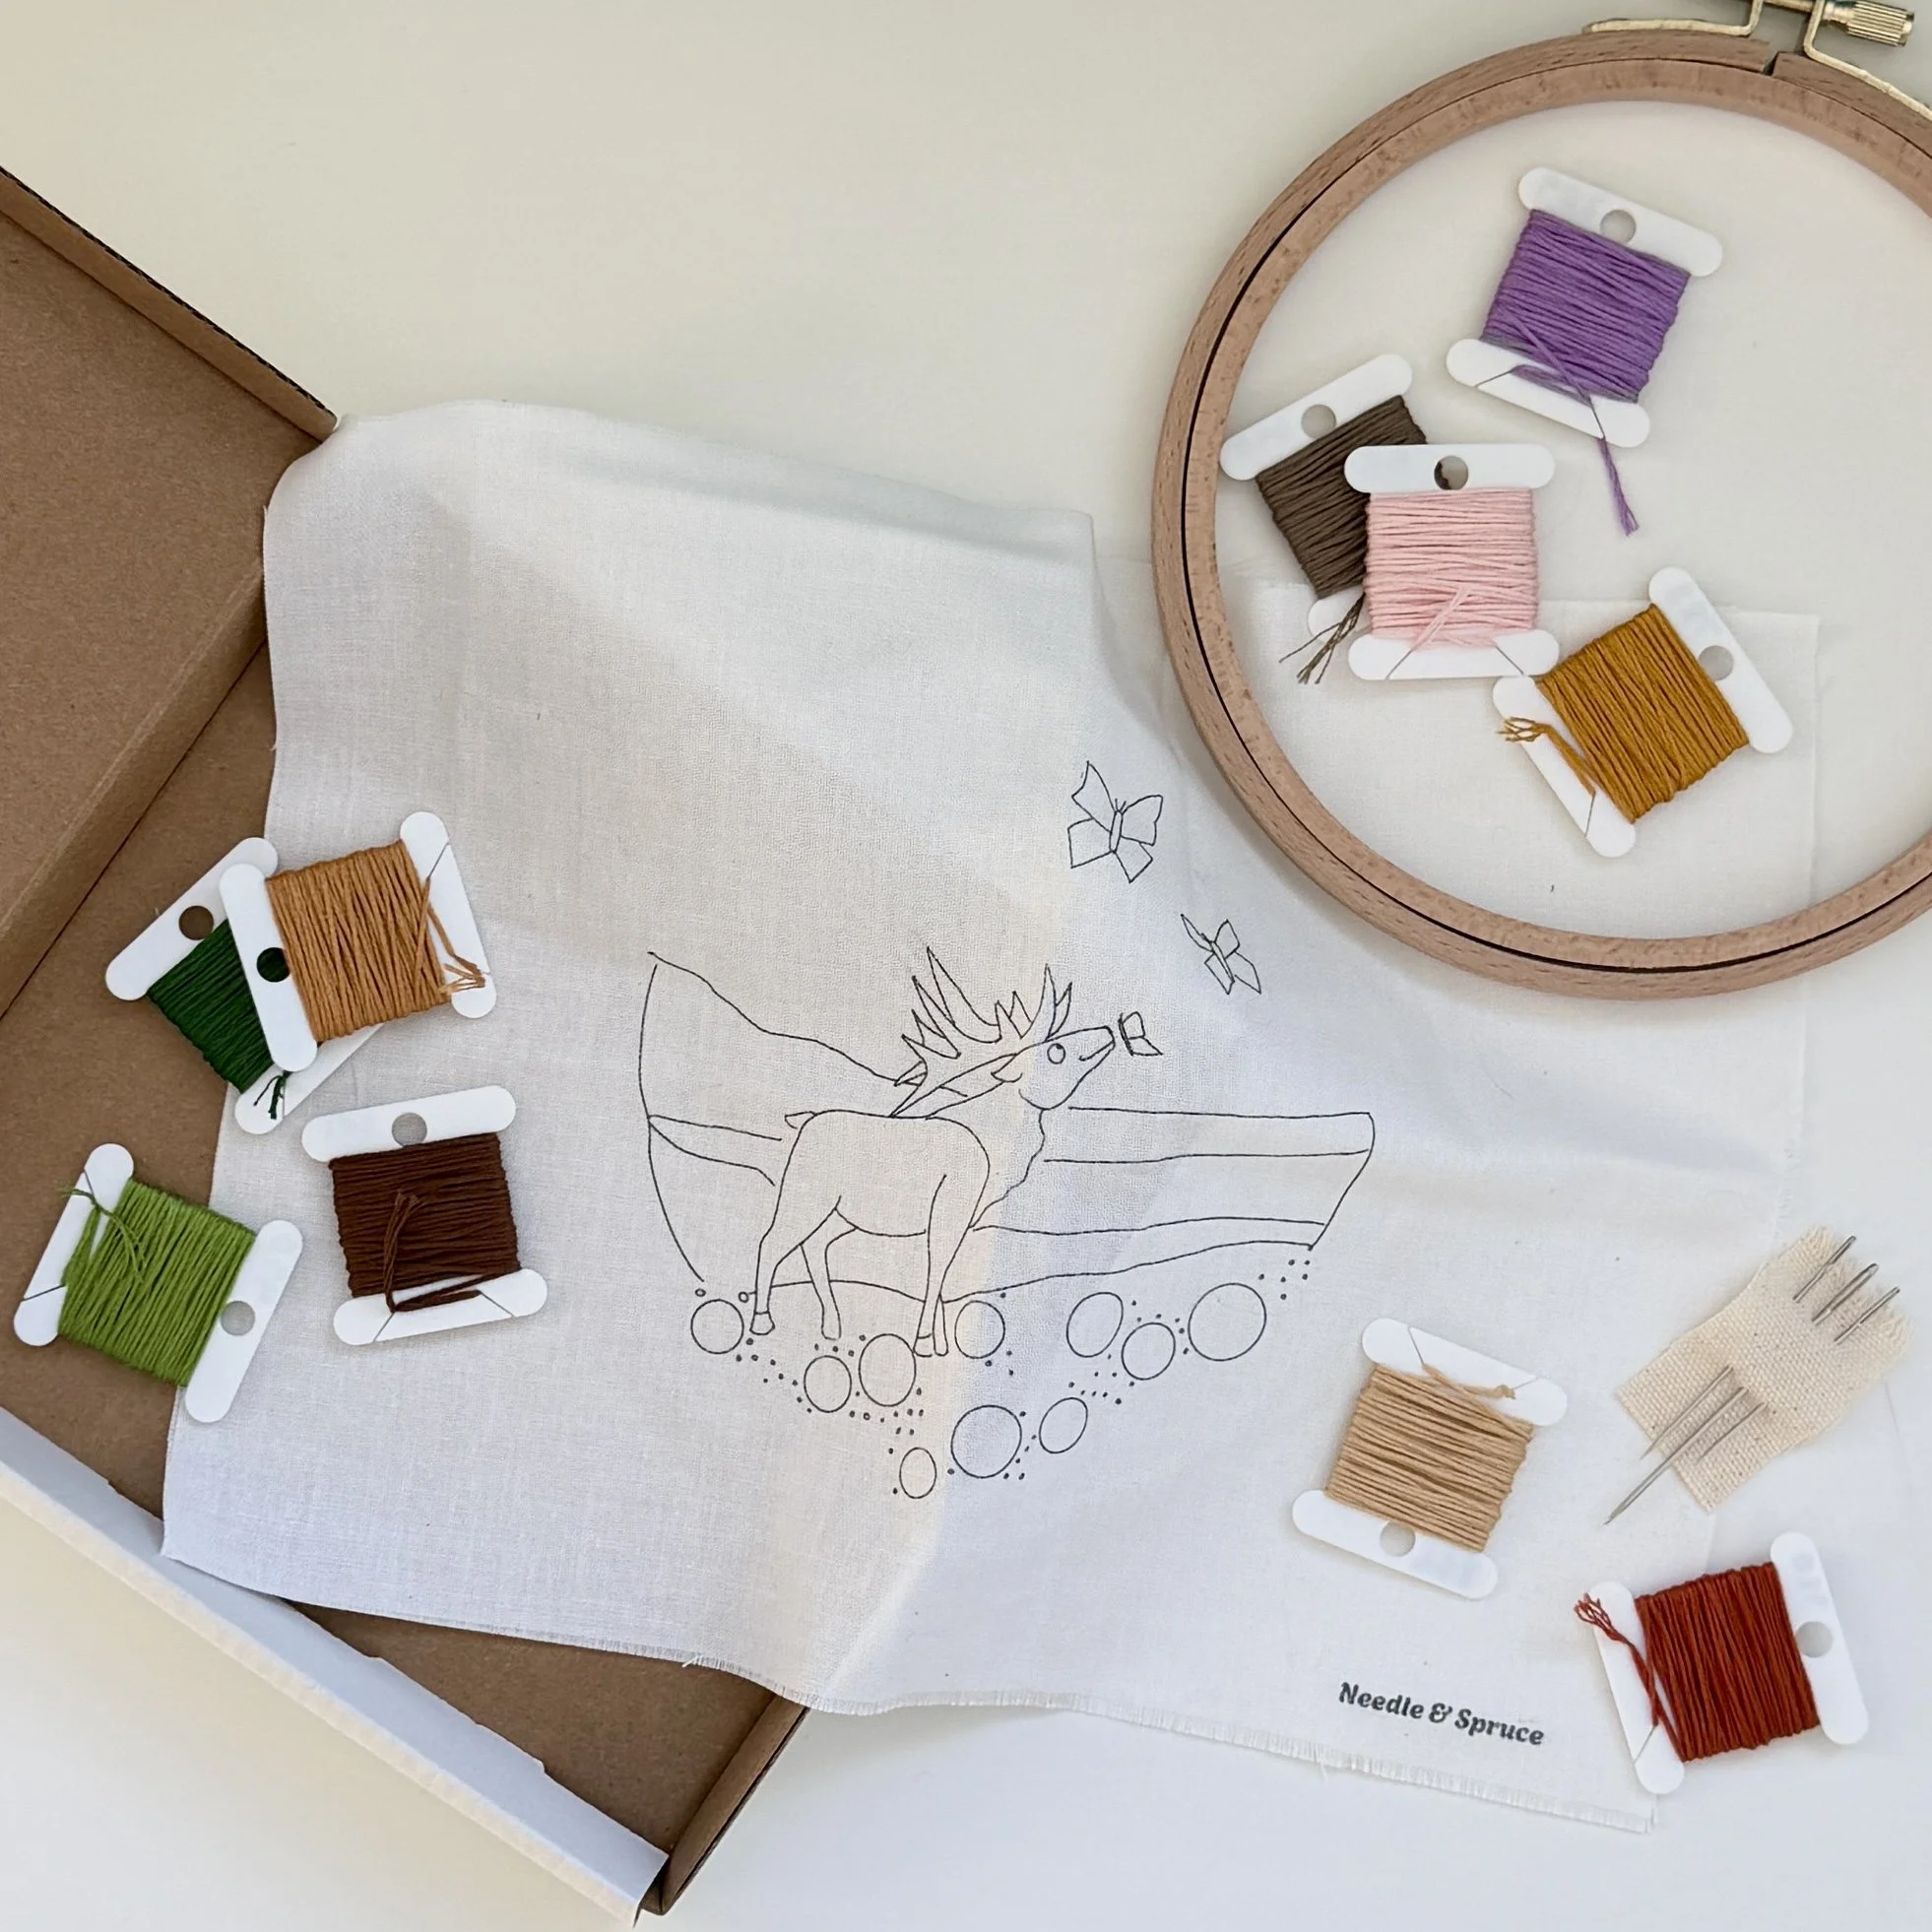
Kit Contents Include:
Box to hold materials
Instructional brochure
Fabric with design printed on it
6-inch beechwood hoop
3 embroidery needles
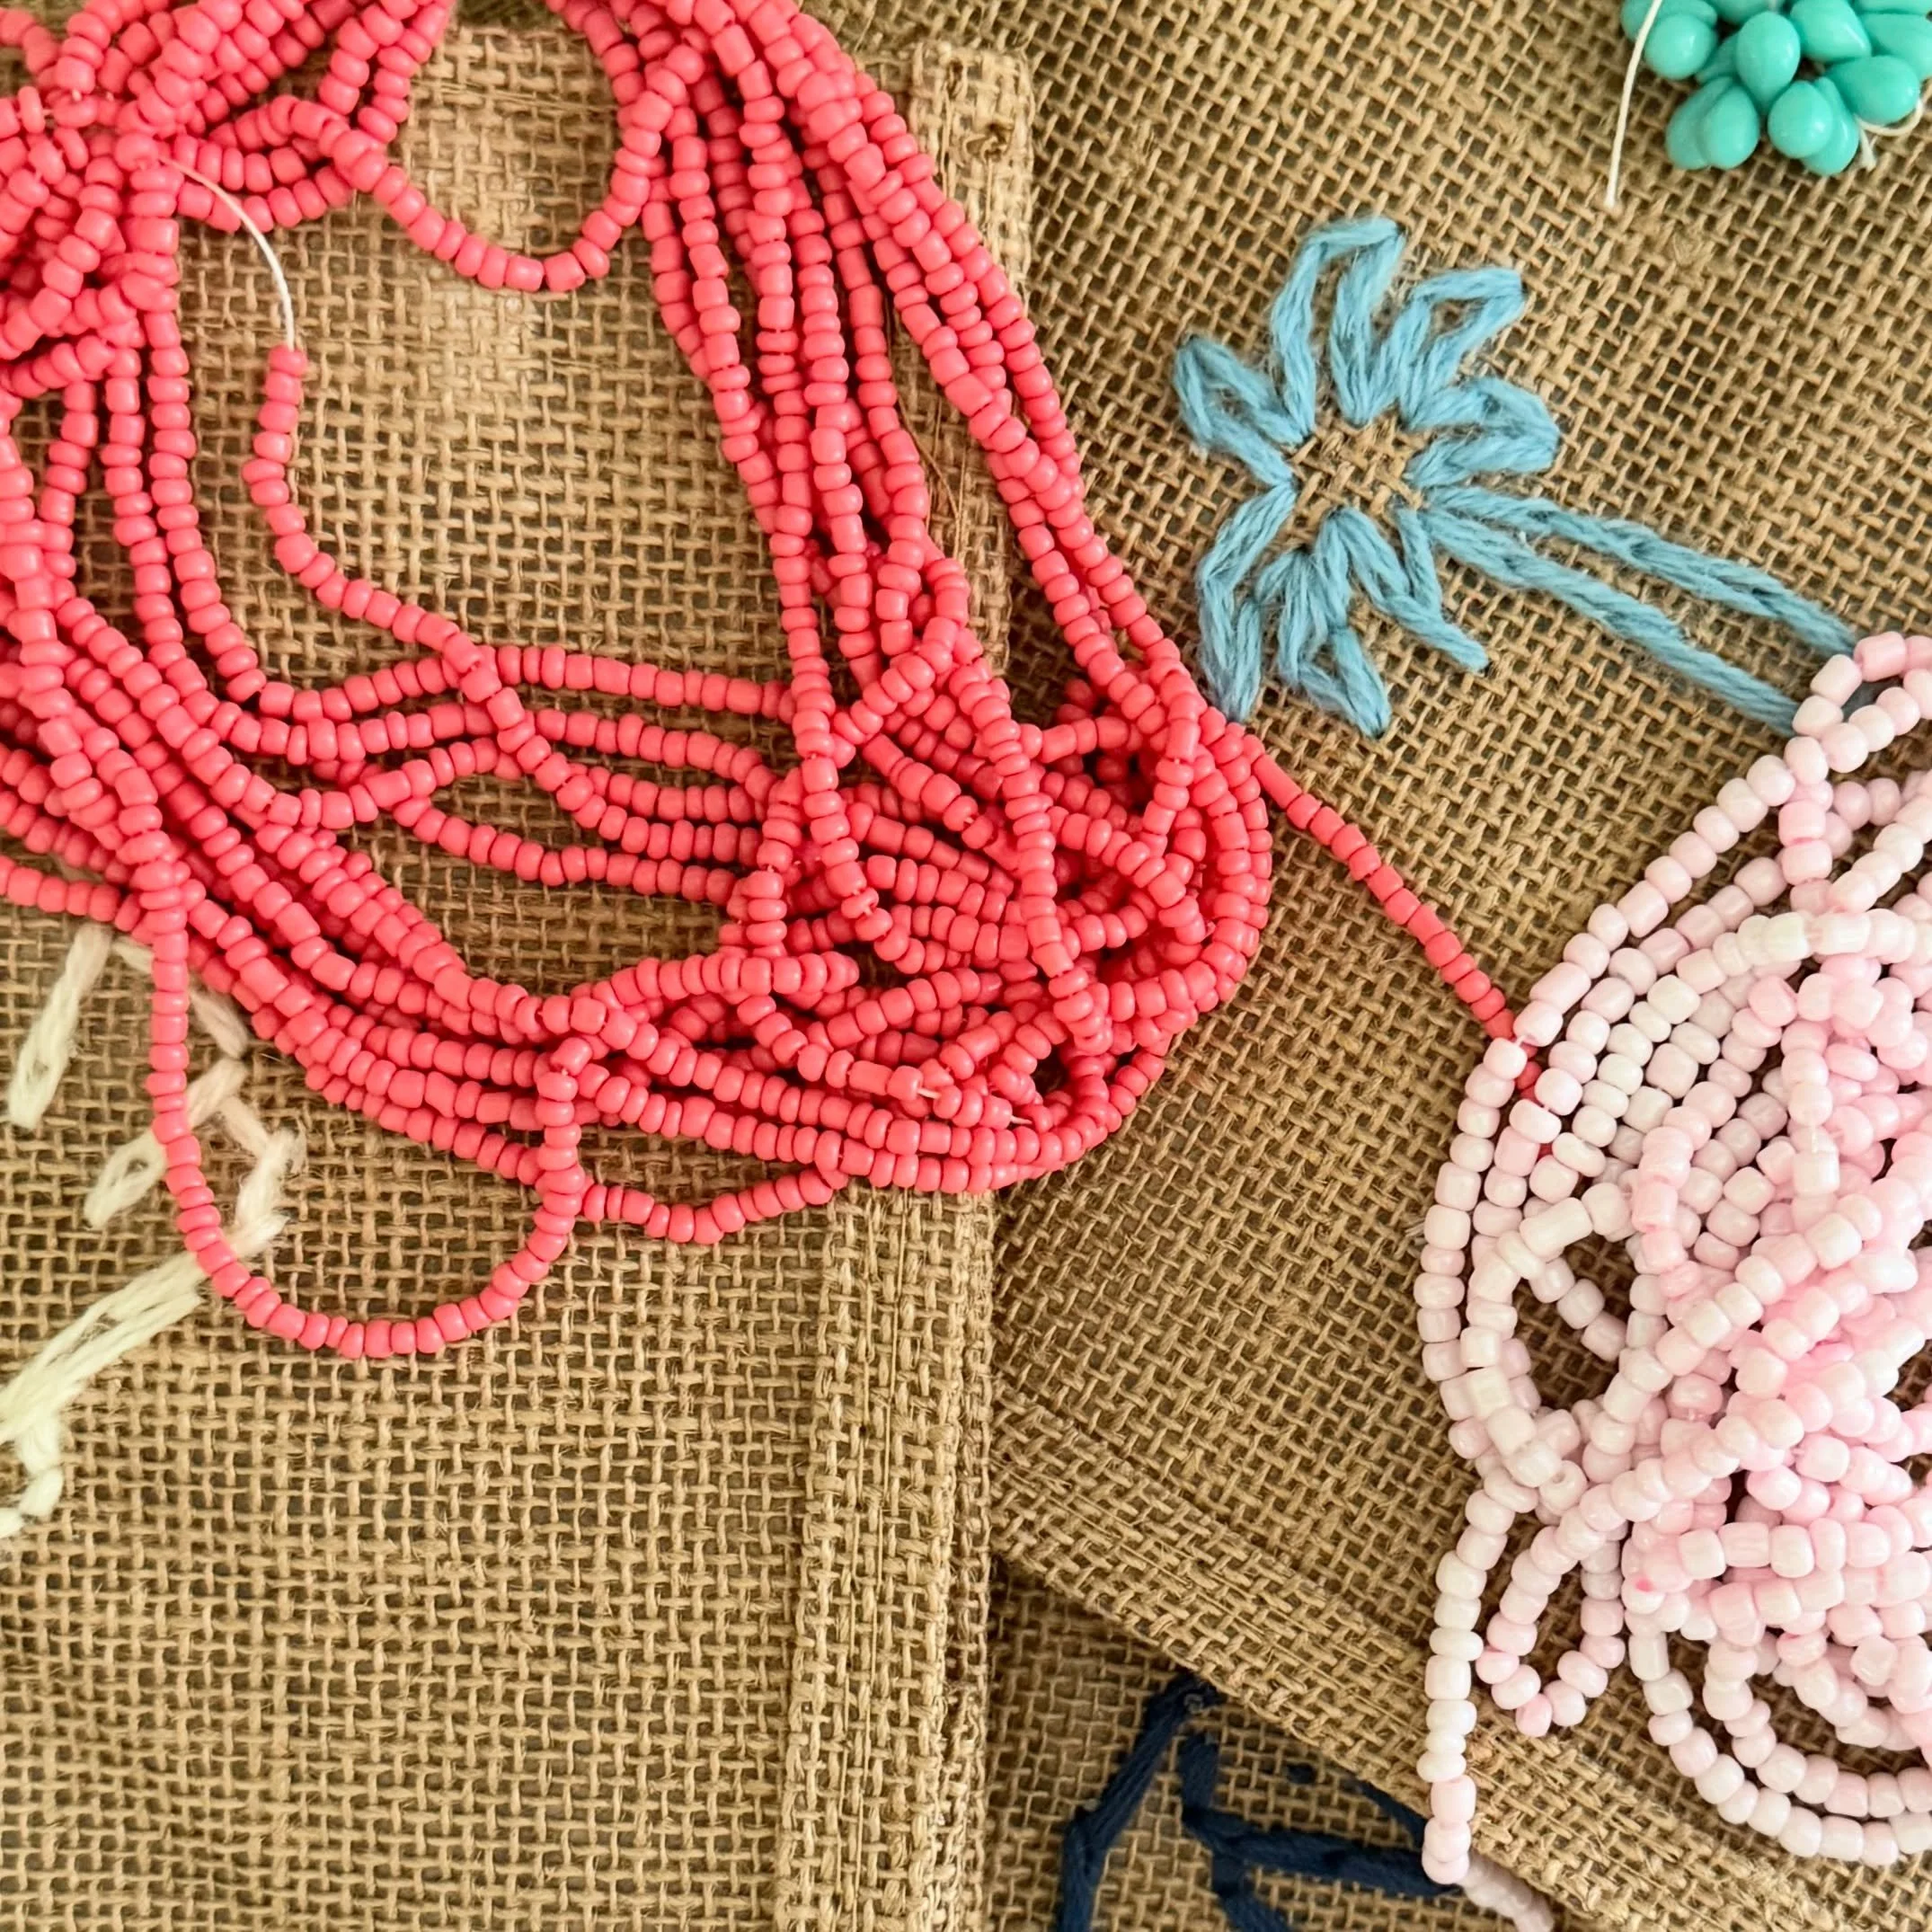
10 DMC embroidery floss colors:
Gray - DMC 640
Brown - DMC 801
Copper - DMC 920
Gold - DMC 783
Tan - DMC 436
Light Beige - DMC 738
Dark Green - DMC 786
Light Green - DMC 470
Light Pink - DMC 818
Lavendar - DMC 209

Getting Started
Separate the two hoops. Center the fabric design on top of the smaller hoop, then secure it taught with the larger hoop on top. Tighten the fastener at the top, pulling the canvas tight at the same time to create a smooth, even surface to work with.
Each piece of floss is composed of 6 individual strands. You can separate these out to create thinner and thicker lines when embroidering.
Cut about an arm’s length of embroidery floss at a time and separate out your desired number of strands. Tie both ends in a double knot to keep the thread in place in the back as you begin.
As you stitch, be sure to keep tension in the thread — but don’t stitch so tight that it puckers.
And if you make a mistake or don’t like the look of something, cut it out and start that section again!
Types of Stitches in This Pattern
-

Split Stitch
Good for outlines and text. You’ll use this stitch to outline the cats, lift, and mountains.
The split back stitch and the back stitch would also work for these outlines.
Begin with a straight line. Pierce this stitch from the bottom (1) and go back down a stitch away (2). Repeat (3).
-

Satin Stitch
Good for filling in larger spaces. You’ll use it to fill in the lift, hat, goggles, and trees.
Begin with a straight line (1,2). Come back up from the same side as 1 to maintain stitch direction (3). Fill shape.
-

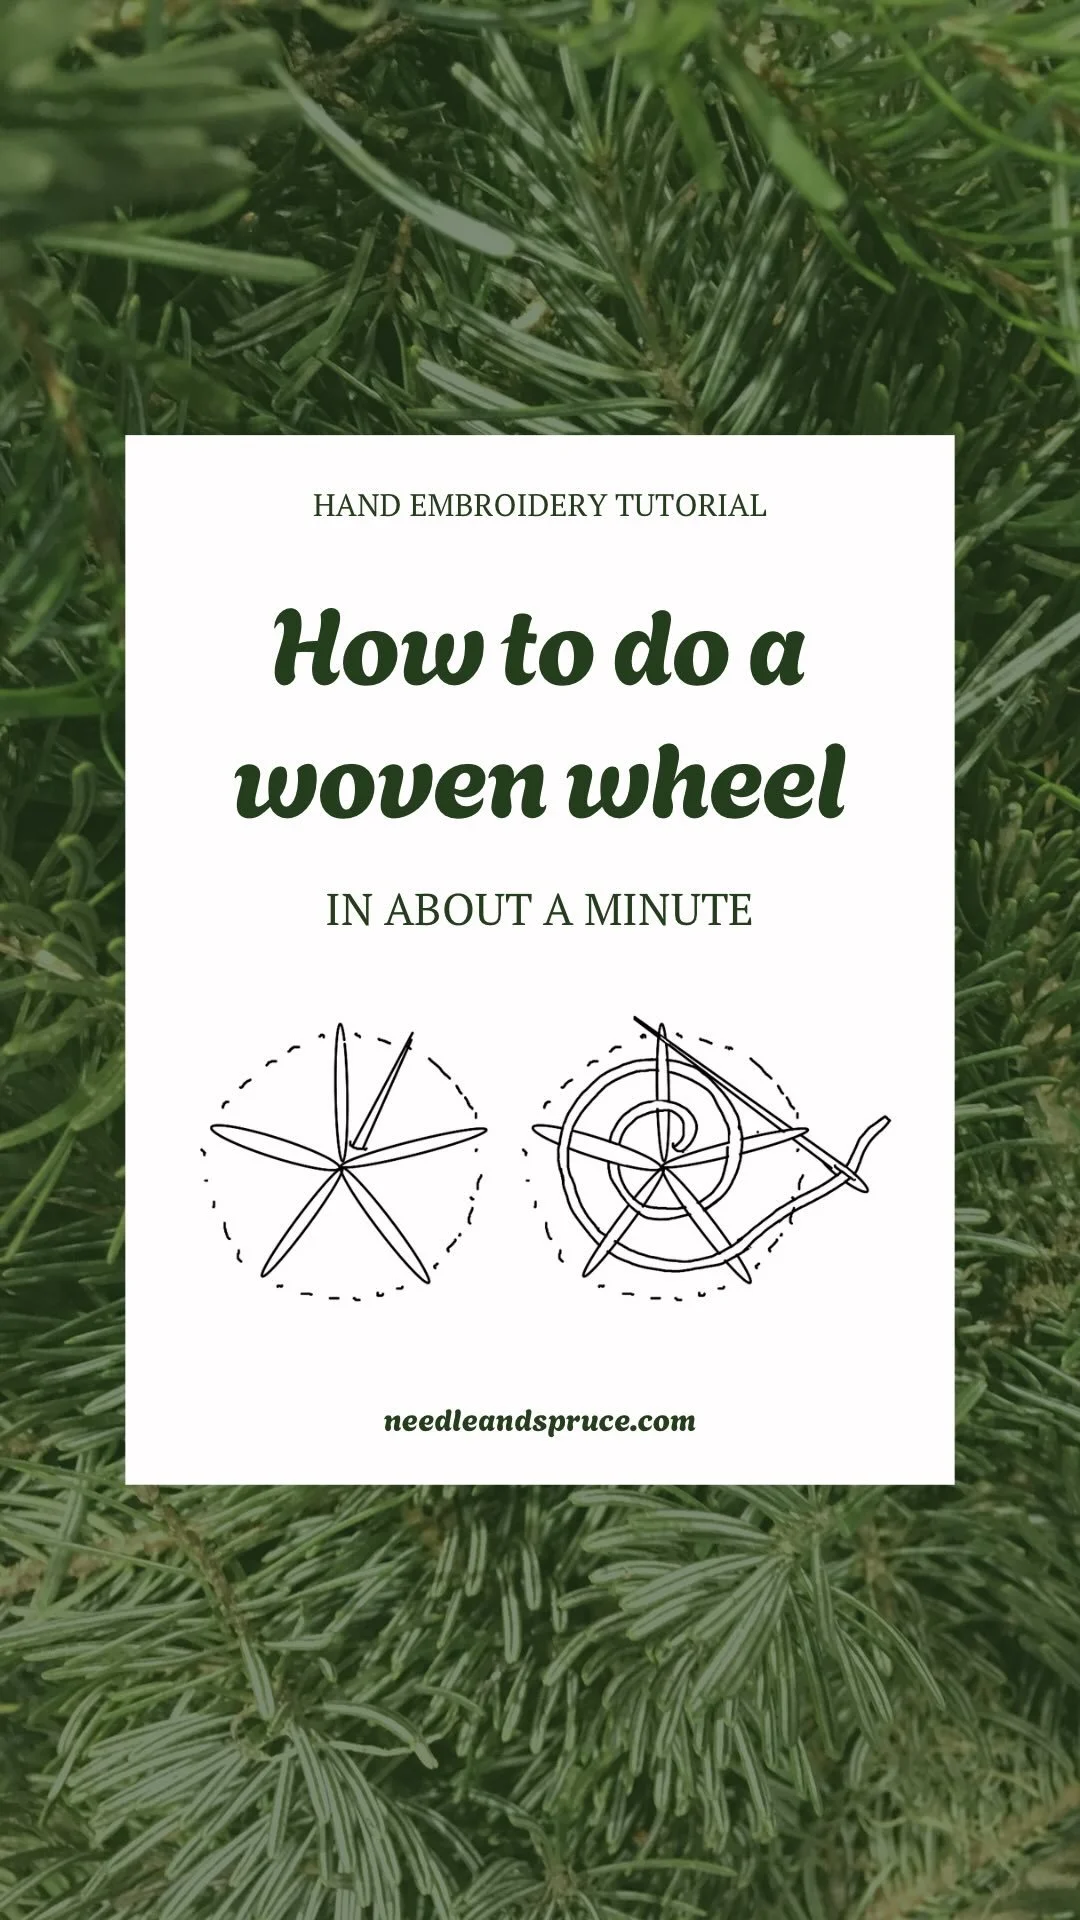
Woven Wheel Stitch
Makes a pinwheel-shaped flower. You can use 3, 5, or 7 spokes — just make sure it’s an odd number. Five spokes are used in the photo example. You’ll use this stitch to create the pink and gold flowers in the foreground of the piece.
Start with 3-5 straight stitches in a star shape. Come up with your needle just outside of the center and weave under and over the straight stitches until finished.
-

French Knot
Makes small knot-shaped circles. You’ll use this stitch for the clouds. A colonial knot stitch would also work here.
Wrap thread around the needle and place the needle tip back near the exit point (2). Pull the thread taught while pulling the needle smoothly through to create a knot.
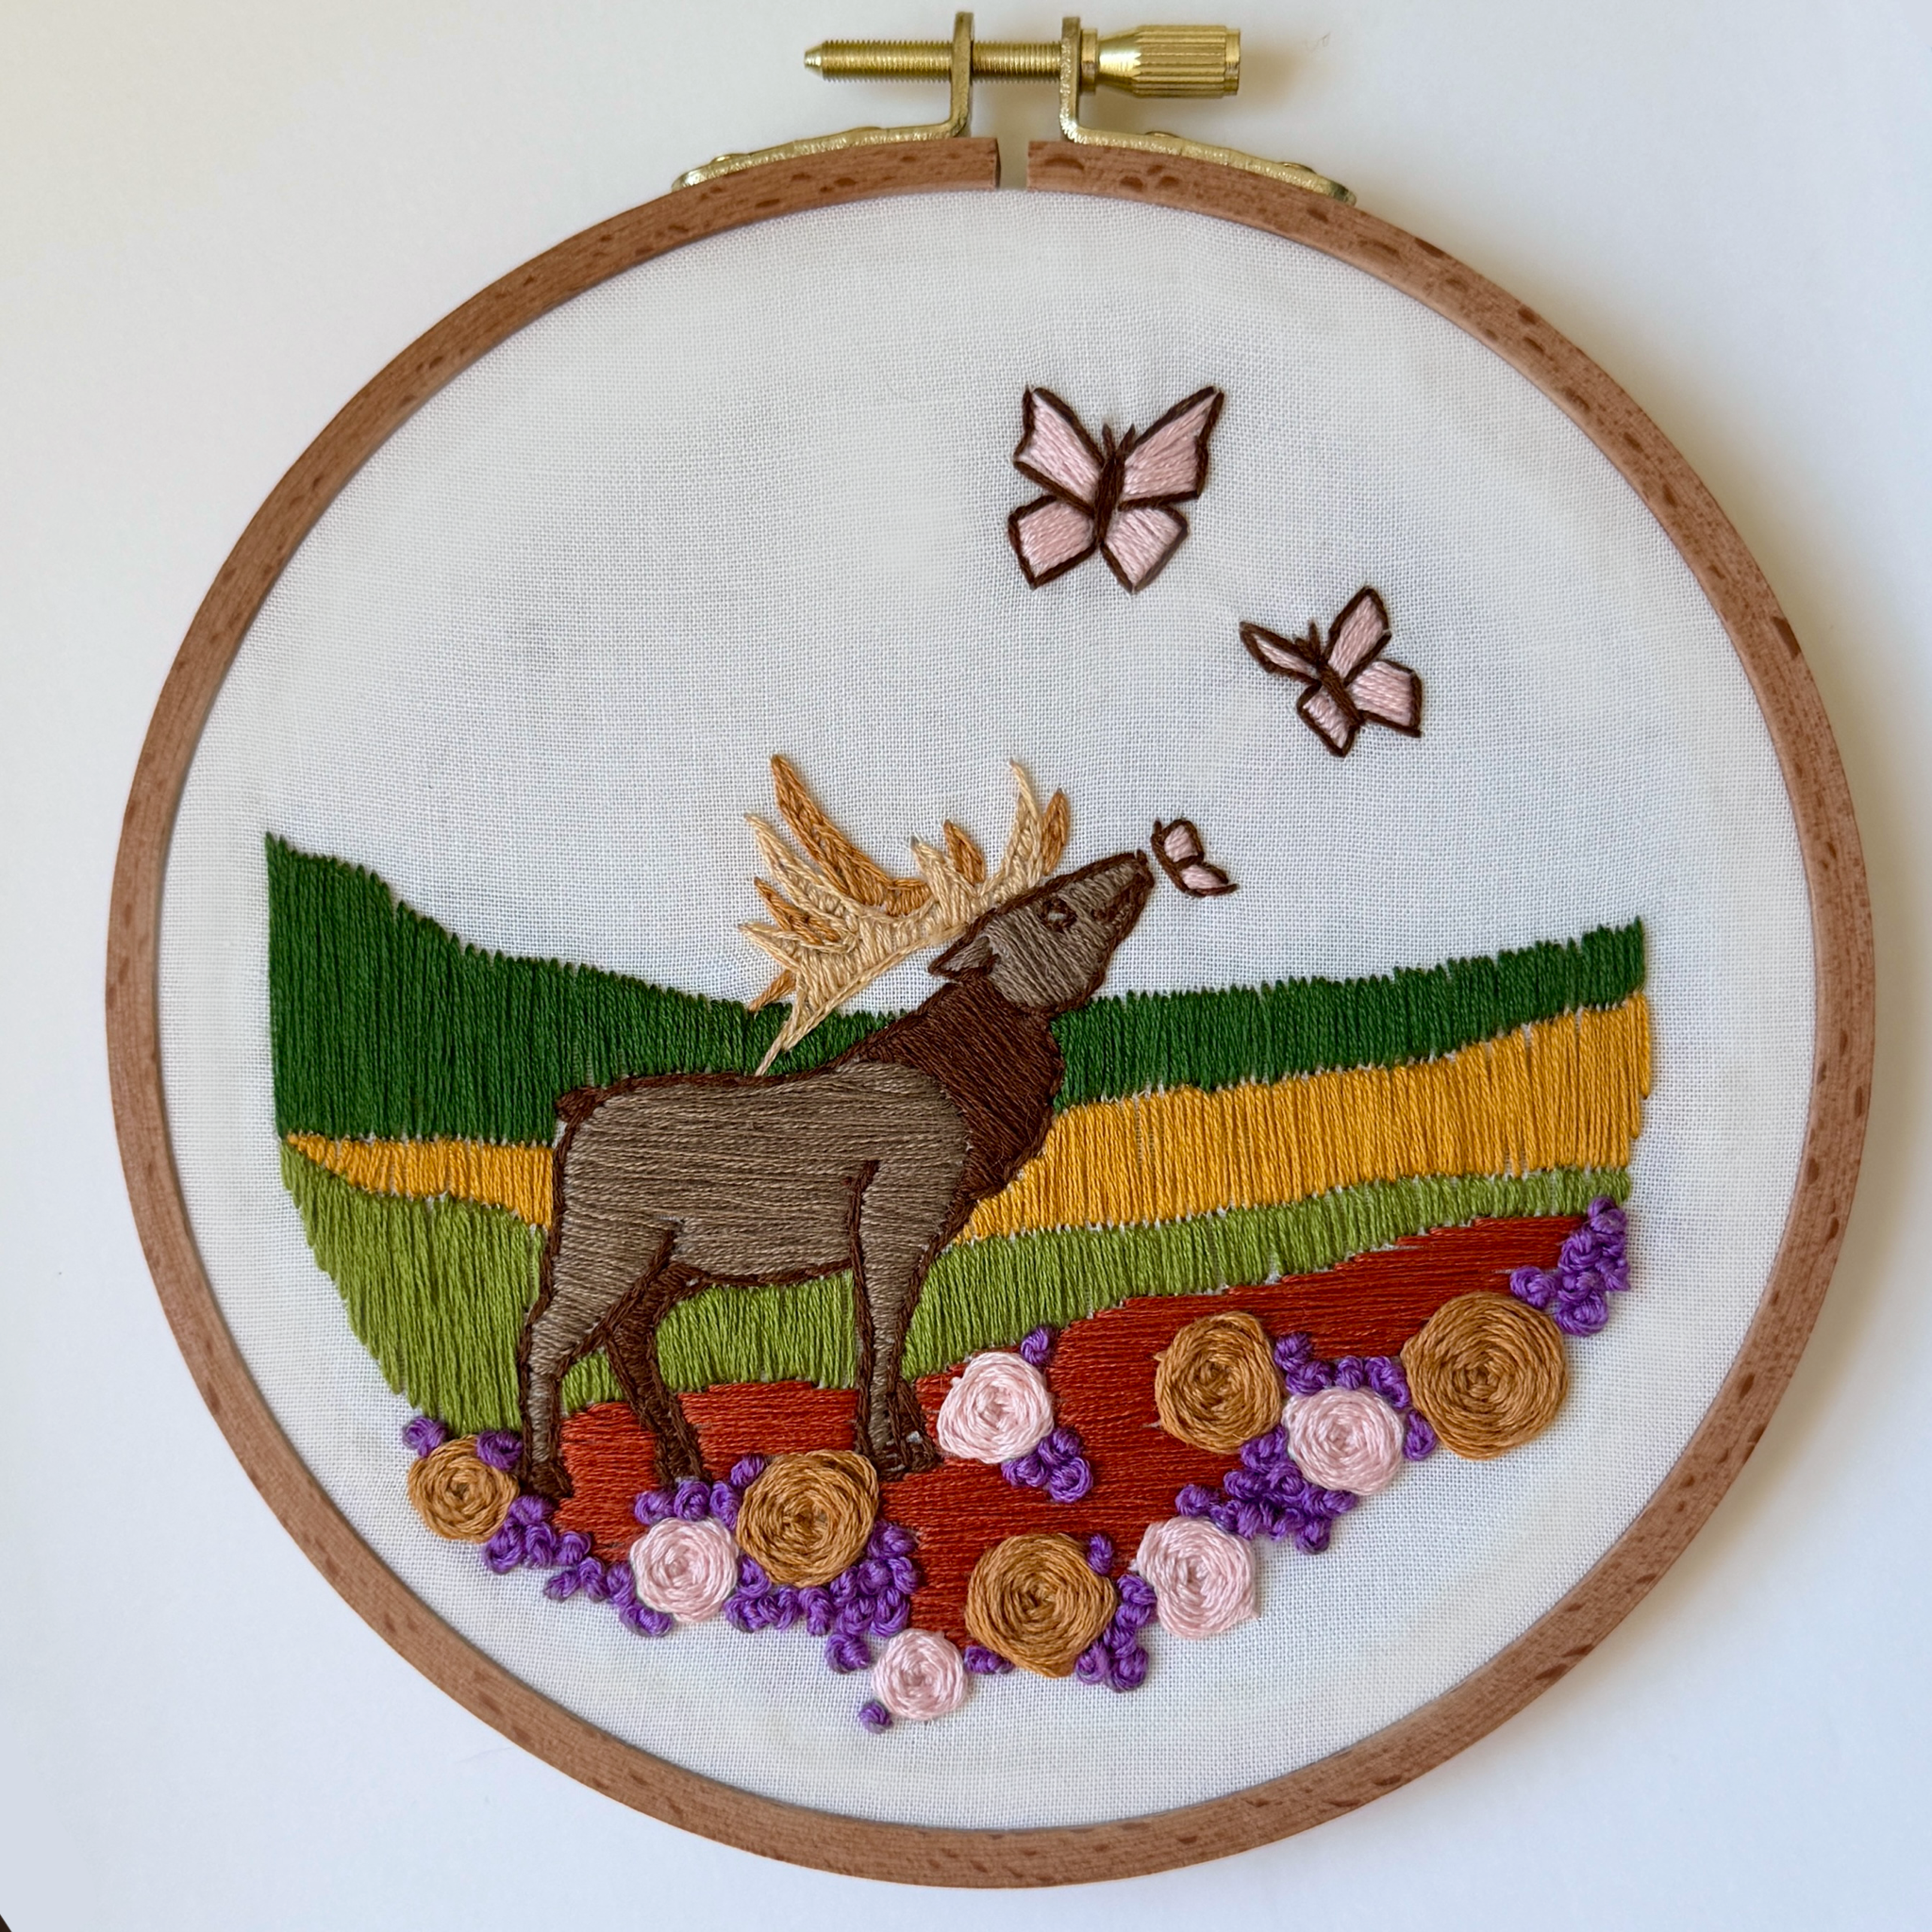
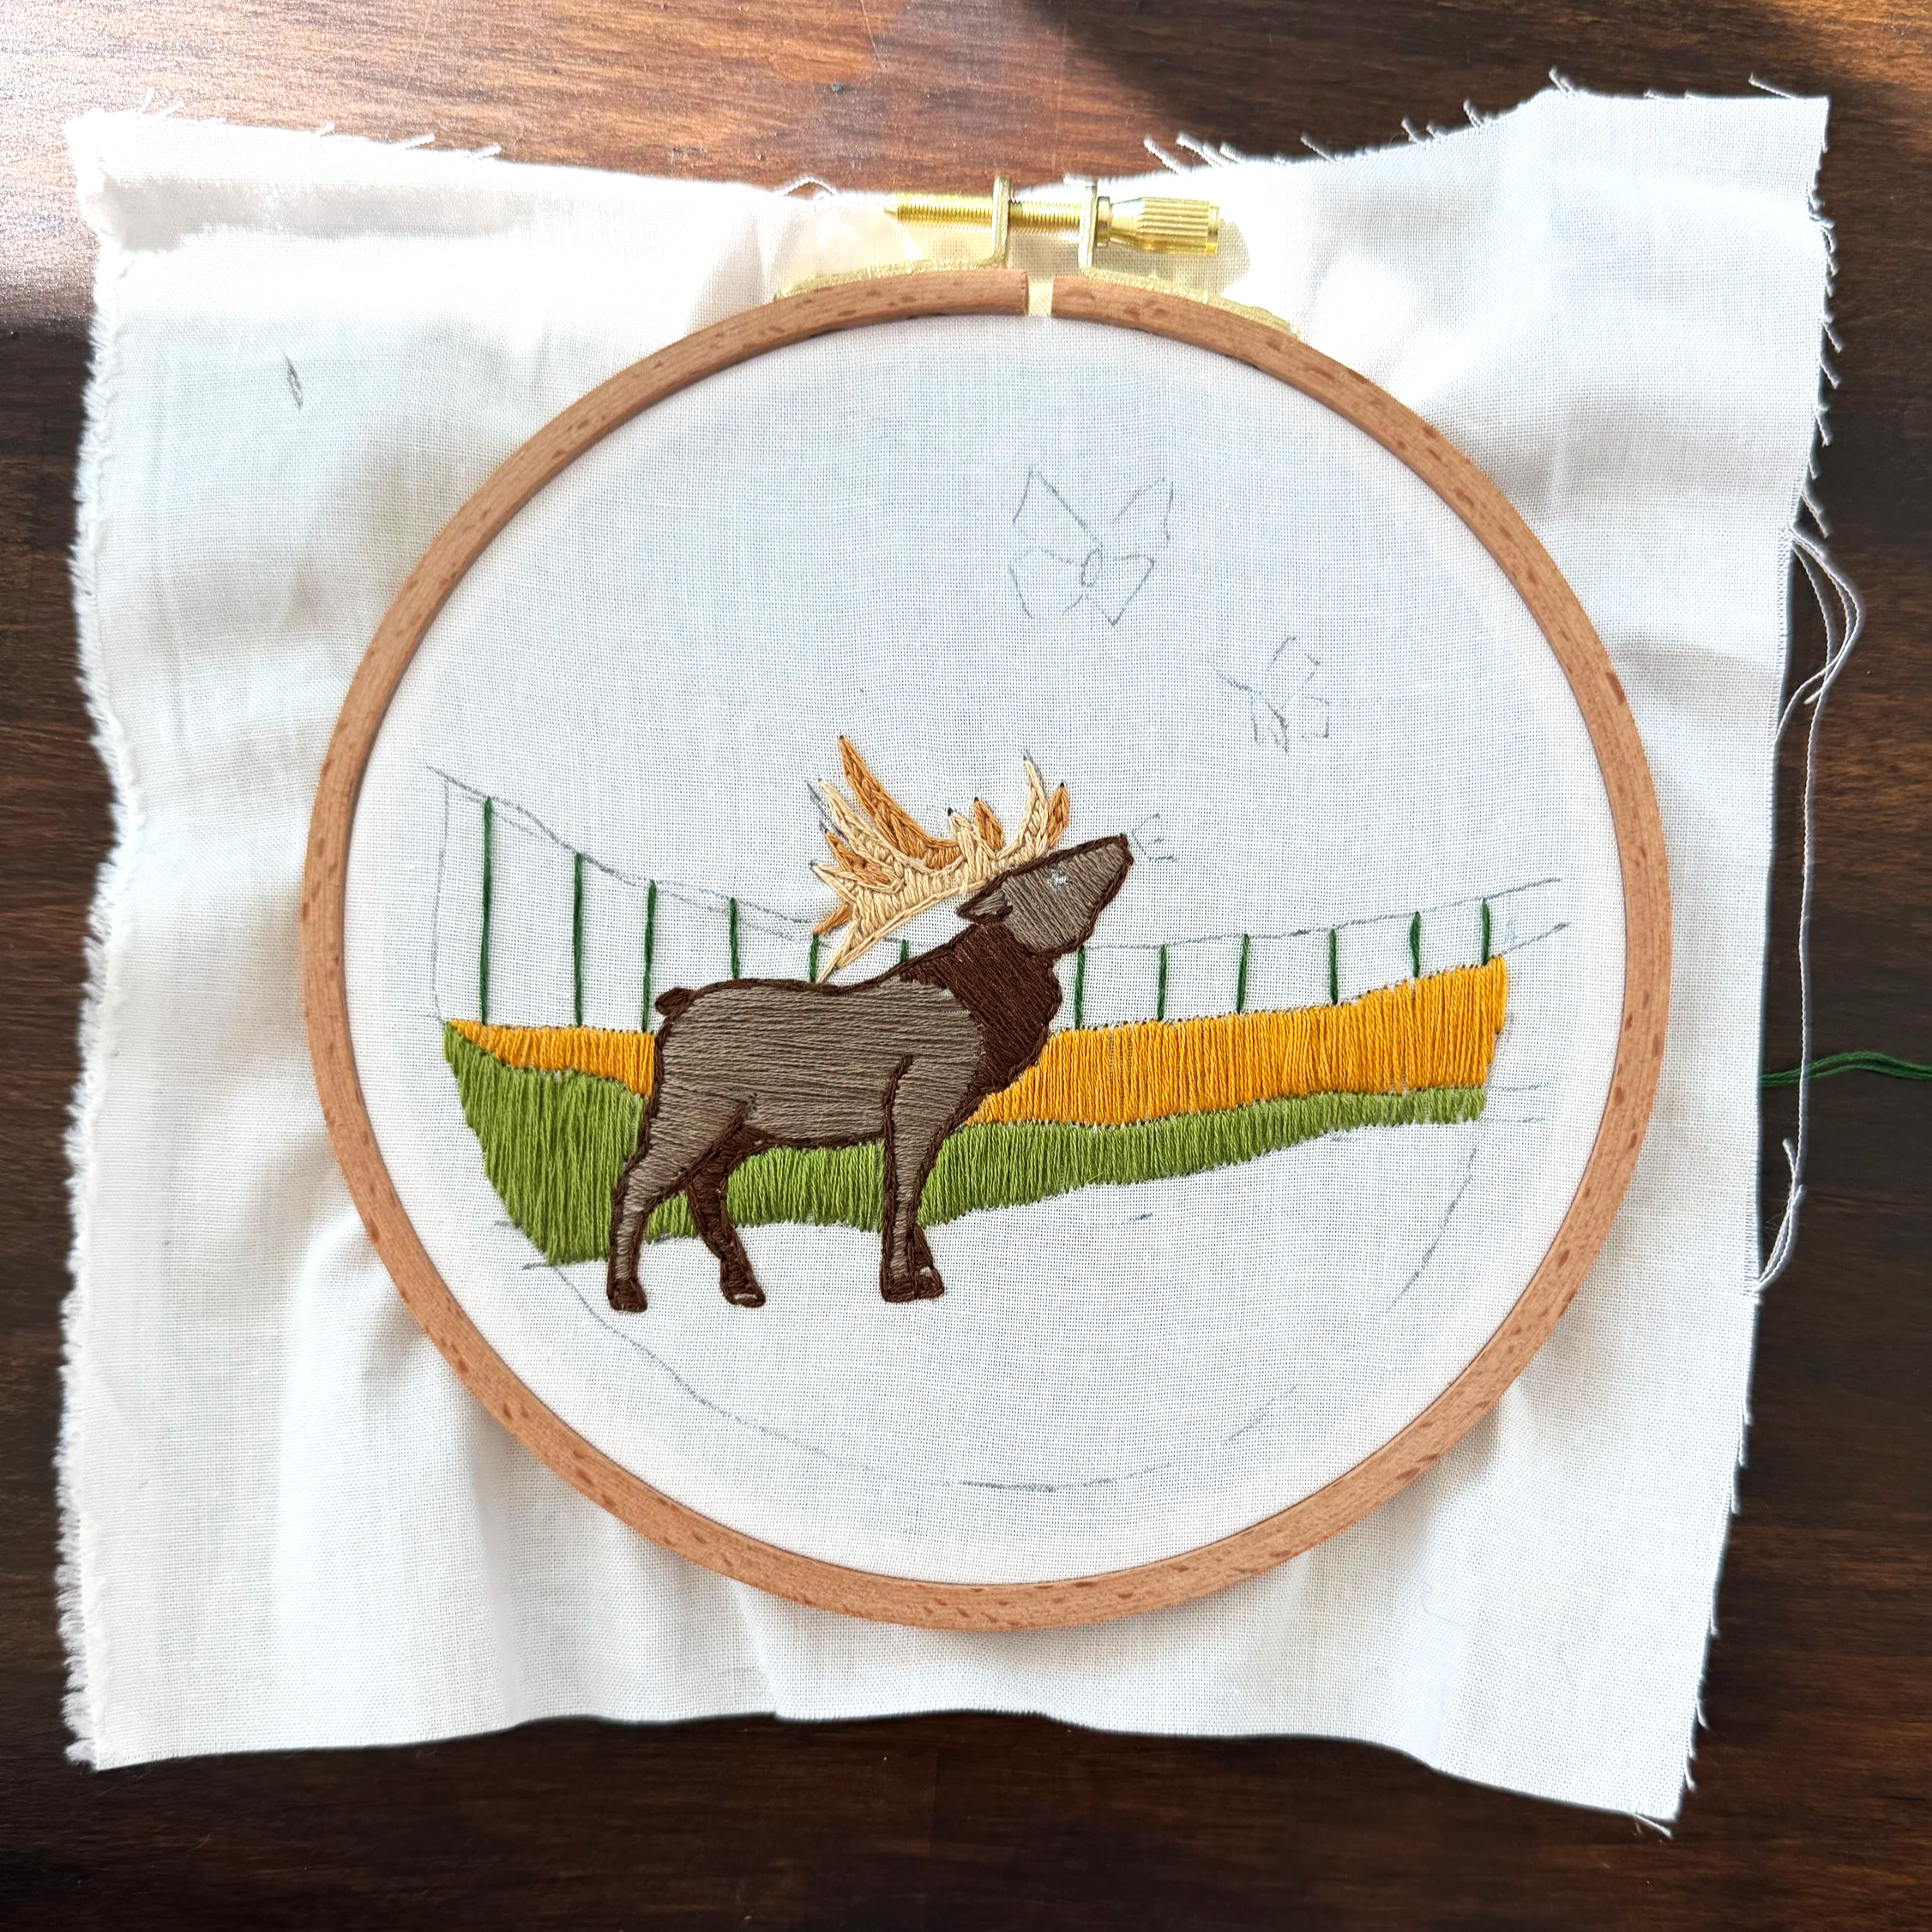
How to Stitch the Design
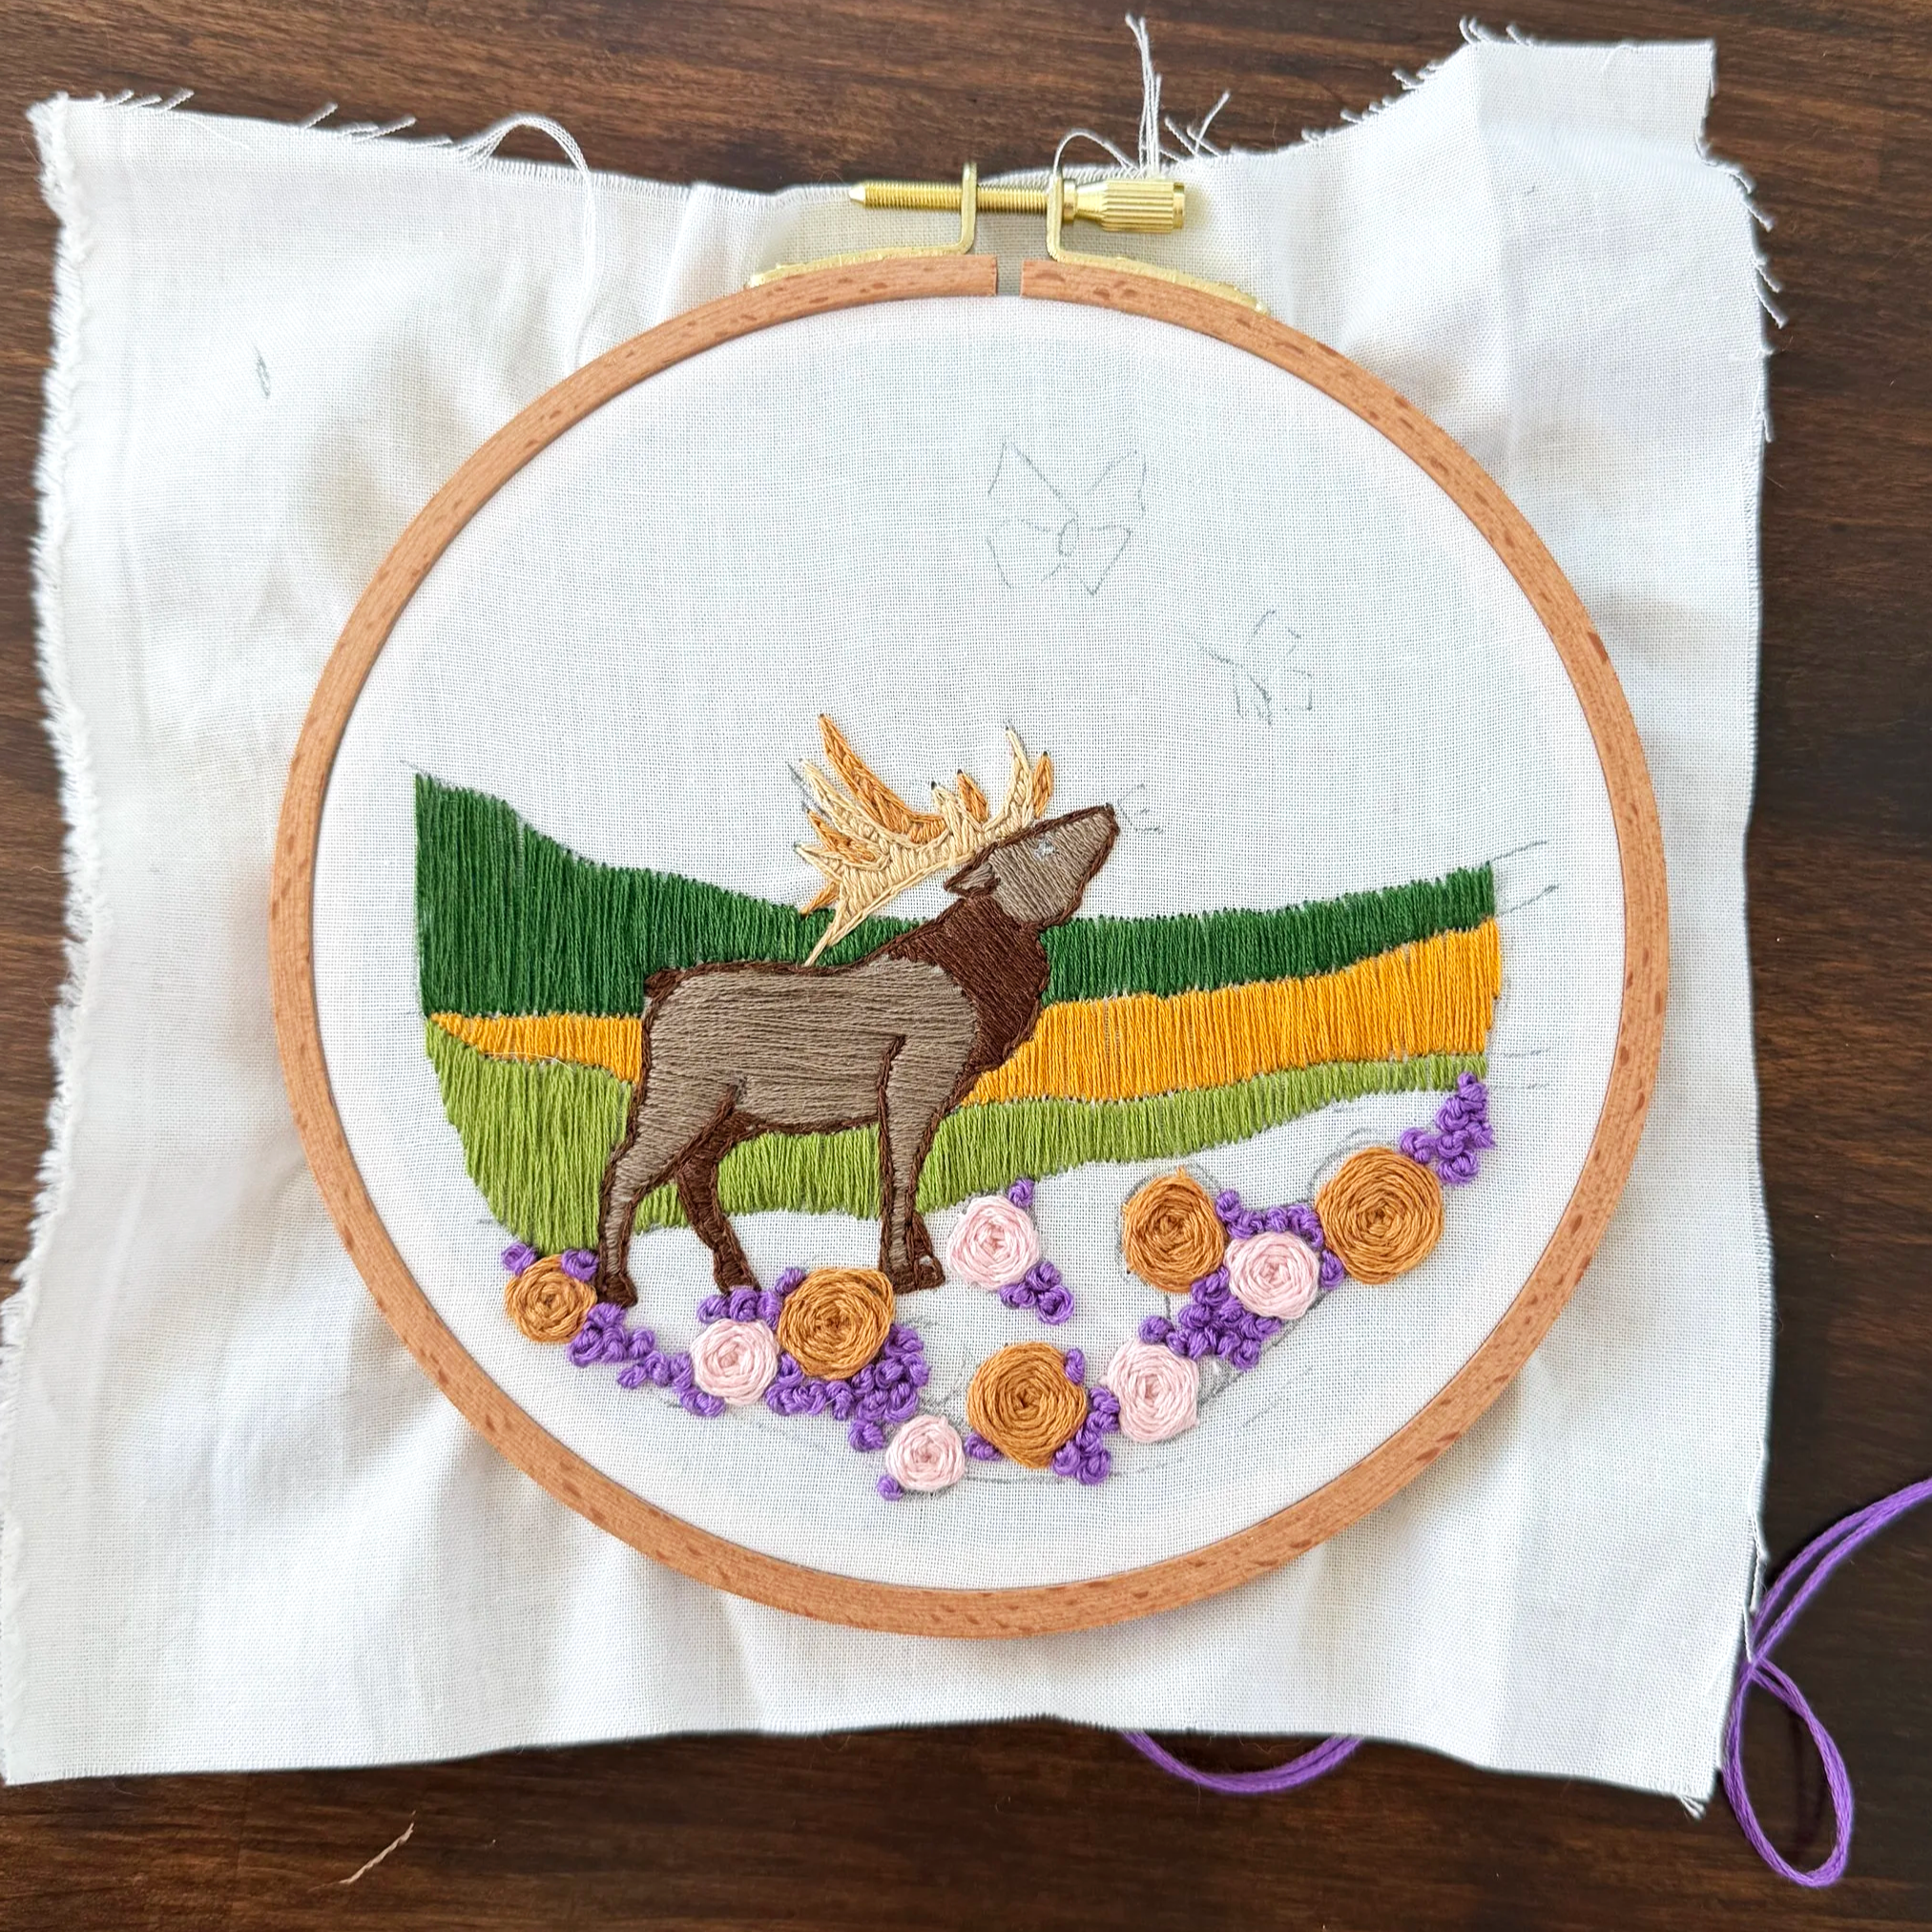
Step 1: Elk
Fill in the elk using satin stitch first before outlining it using split stitch.
Use 2-3 strands of 640 to fill in the body using satin stitch.
Use 2-3 strands of 801 to fill in the background legs, front hooves, tail, and neck/beard using satin stitch.
Use 2-3 strands of 738 to fill in foreground the antler with satin stitch, then outline this antler with split stitch.
Use 2-3 strands of 436 to fill in the background antler with satin stitch, then outline this antler with split stitch.
Use 2 strands of 801 to outline the elk using split stitch, and use only 1 strand for its eyes to create better definition.
Step 2: Meadow
Fill in the meadow backdrop with satin stitch using vertical lines.
Use 2-3 strands of 986 for the top layer, 2-3 strands of 783 for the middle layer, and 2-3 strands of 470 for the bottom layer.
Hold off on the copper-colored ground layer for now – you’ll want to fill that in after the flowers are finished.
Step 3: Flowers
Use 3-4 strands of 738 for the goldish-brown flowers using woven wheel stitch.
Use 3-4 strands of 818 for the pink flowers using woven wheel stitch.
Use 6 strands of 209 for the small purple flowers using french knot. The pattern shows a general guide for their placement, but feel free to get creative and use as much or as little of this as you like.
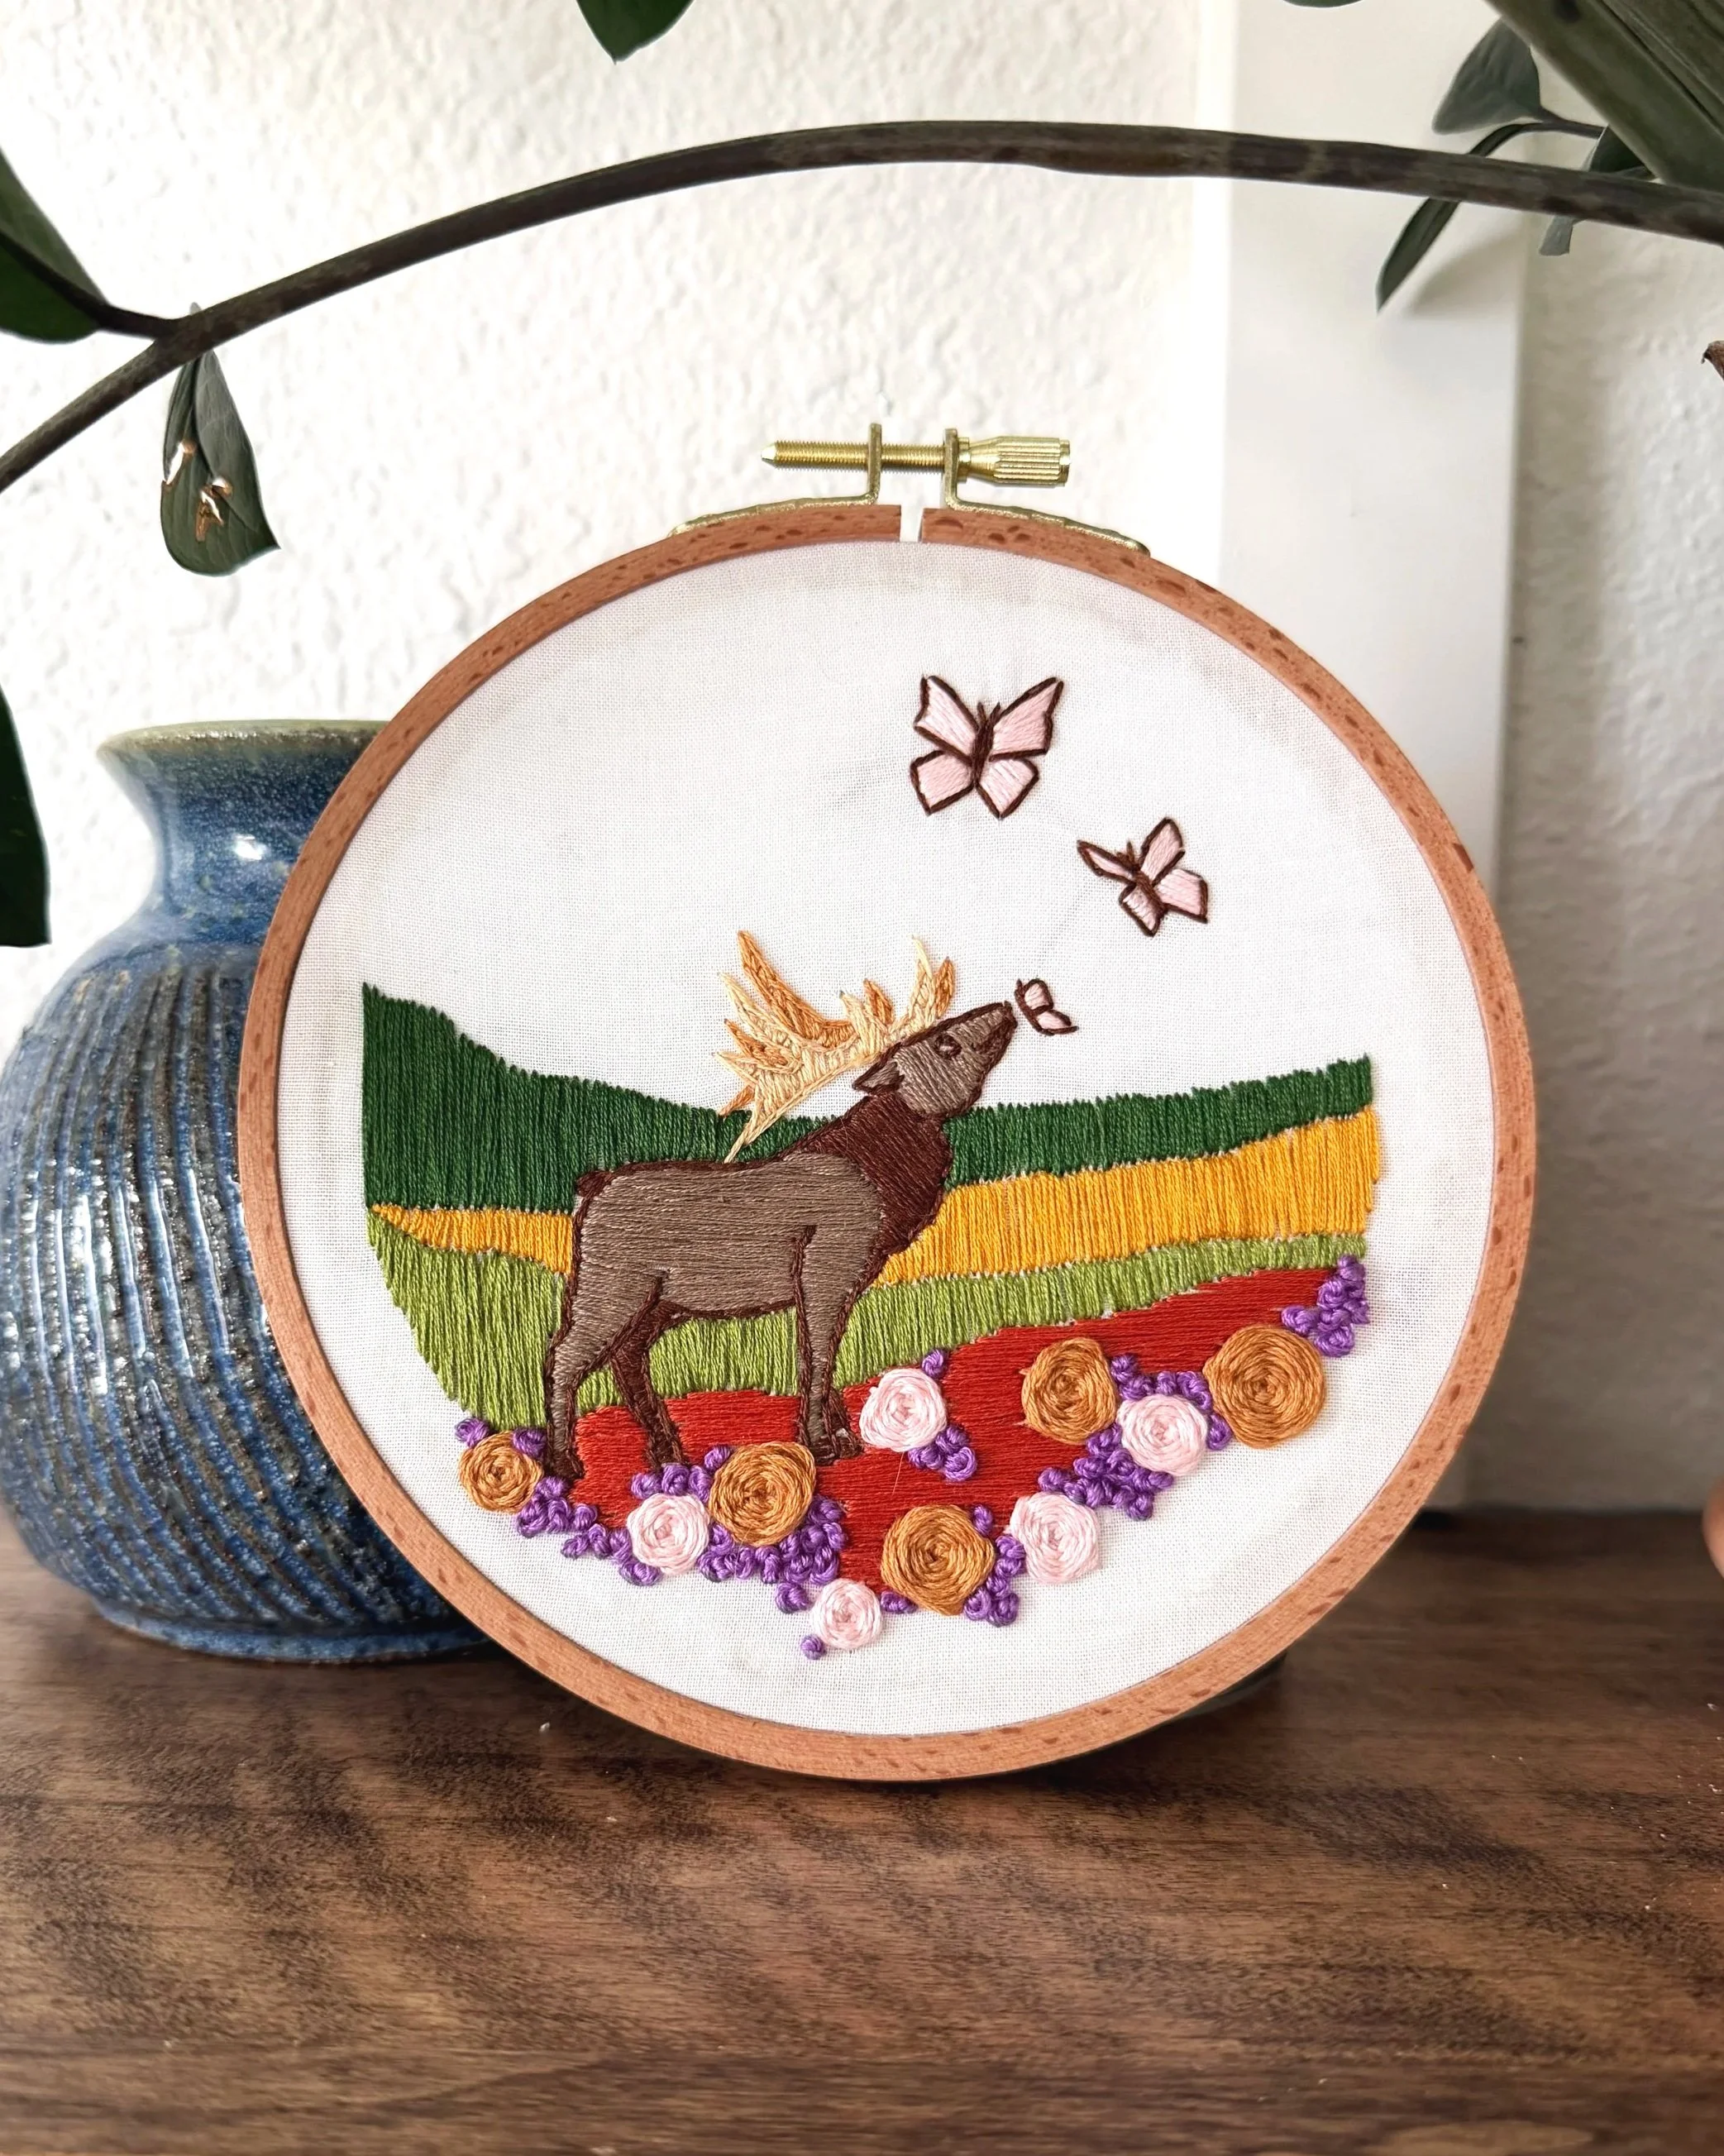
Step 4: Ground
Fill in the ground layer around the flowers, stitching horizontally.
Use 2-3 strands of 920 to fill in the ground using satin stitch.
Step 5: Butterflies
Fill in the butterflies using satin stitch first before outlining them using split stitch.
Use 2-3 strands of 818 to fill in the wings using satin stitch.
Then, use 1-2 strands of 801 to outline the butterflies using split stitch.
If you haven’t already, be sure to finish the elk’s eye and mouth with 1-2 strands of 801 as well.


Finishing the Hoop
There are a number of ways to finish the back of the hoop once you’re done. One method:
Thread a needle with more than enough thread to go all the way around the circle – whatever you have leftover.
Then, using large running stitches, working about ¼ inch from the fabric edge, sew the excess cloth around the circle.
When you reach the beginning, pull both ends of thread to gather the fabric tightly and secure with a double knot.
Here’s a video for how to do this. Or if you have felt at home, consider giving this method a try!
And if you have hot glue at home, another method is to cut the excess fabric, leaving about a ¼ inch around the edge of the hoop. Then, hot glue the cut edges down along the inside hoop at the back.


Once you’re done, post a photo of your finished piece, tag @needleandspruce, and use the hashtag #needleandspruce! We love to see your creations! 🌲